
Managing Your Email Sequence
This guide walks you through the steps to enroll and unenroll candidates or contacts from an email sequence in your CRM.
⚠️ Note: The sequencing feature is available on the Business Plan. Free and Pro plan users can create only 1 sequence. Only account owners, admins, and users with appropriate custom role permissions can create and manage sequences.
✅ Enrolling Candidates or Contacts into a Sequence
Section titled “✅ Enrolling Candidates or Contacts into a Sequence”Follow these steps to enroll contacts or candidates into a sequence:
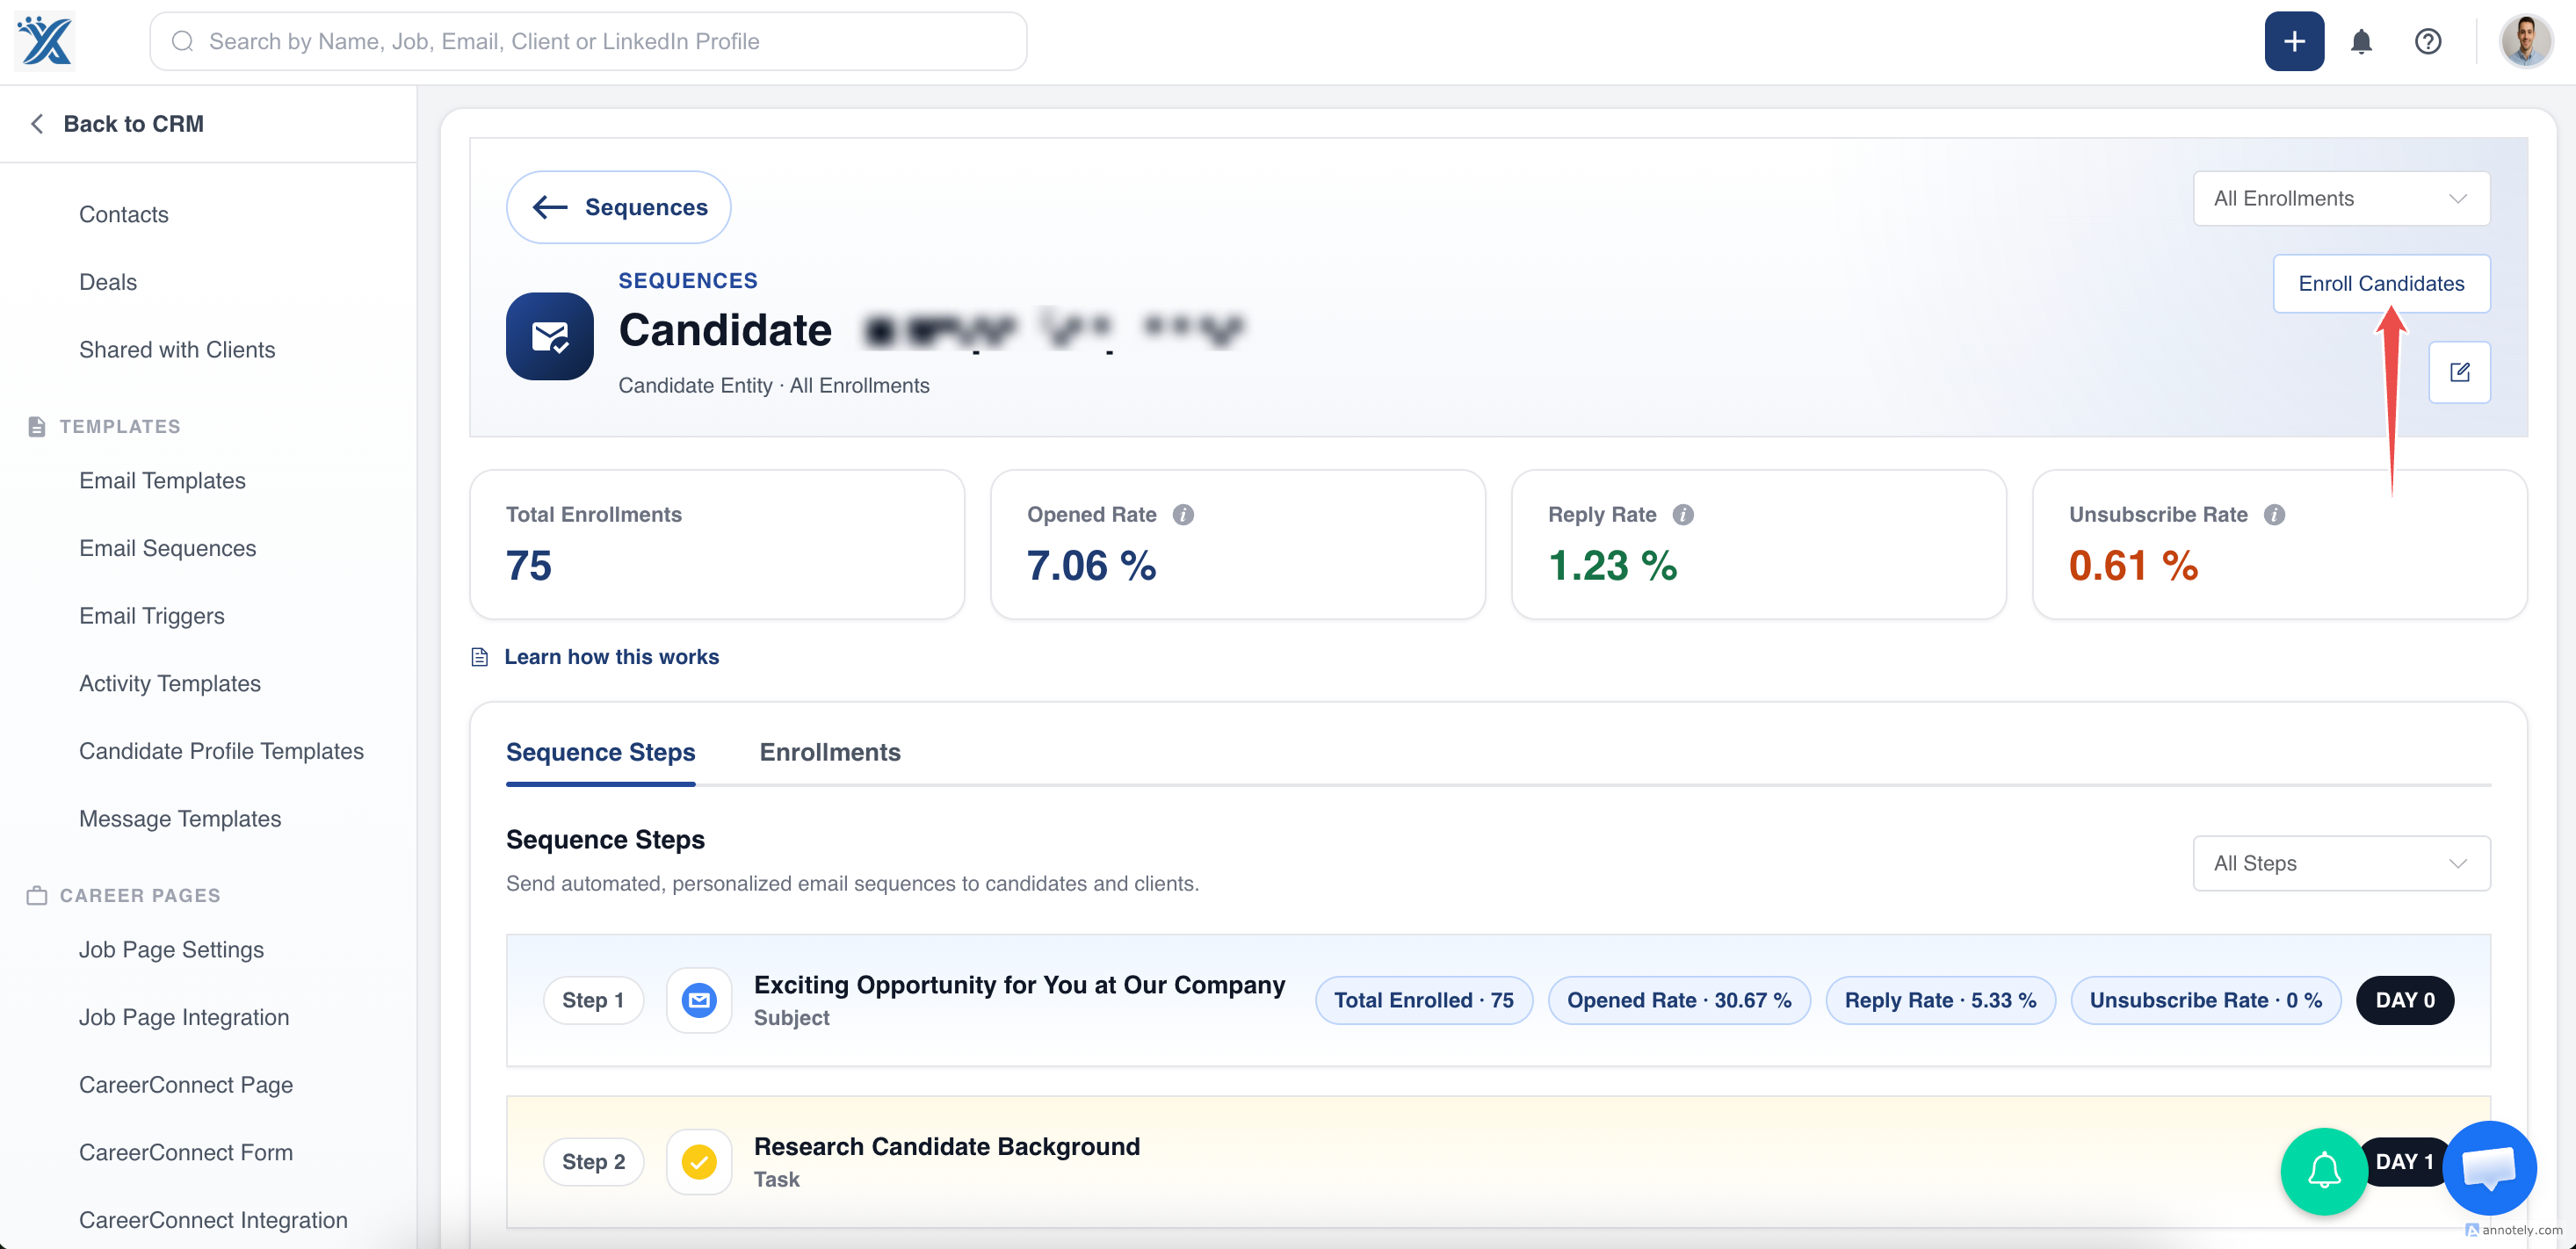
1. Go to the Sequence Details Page
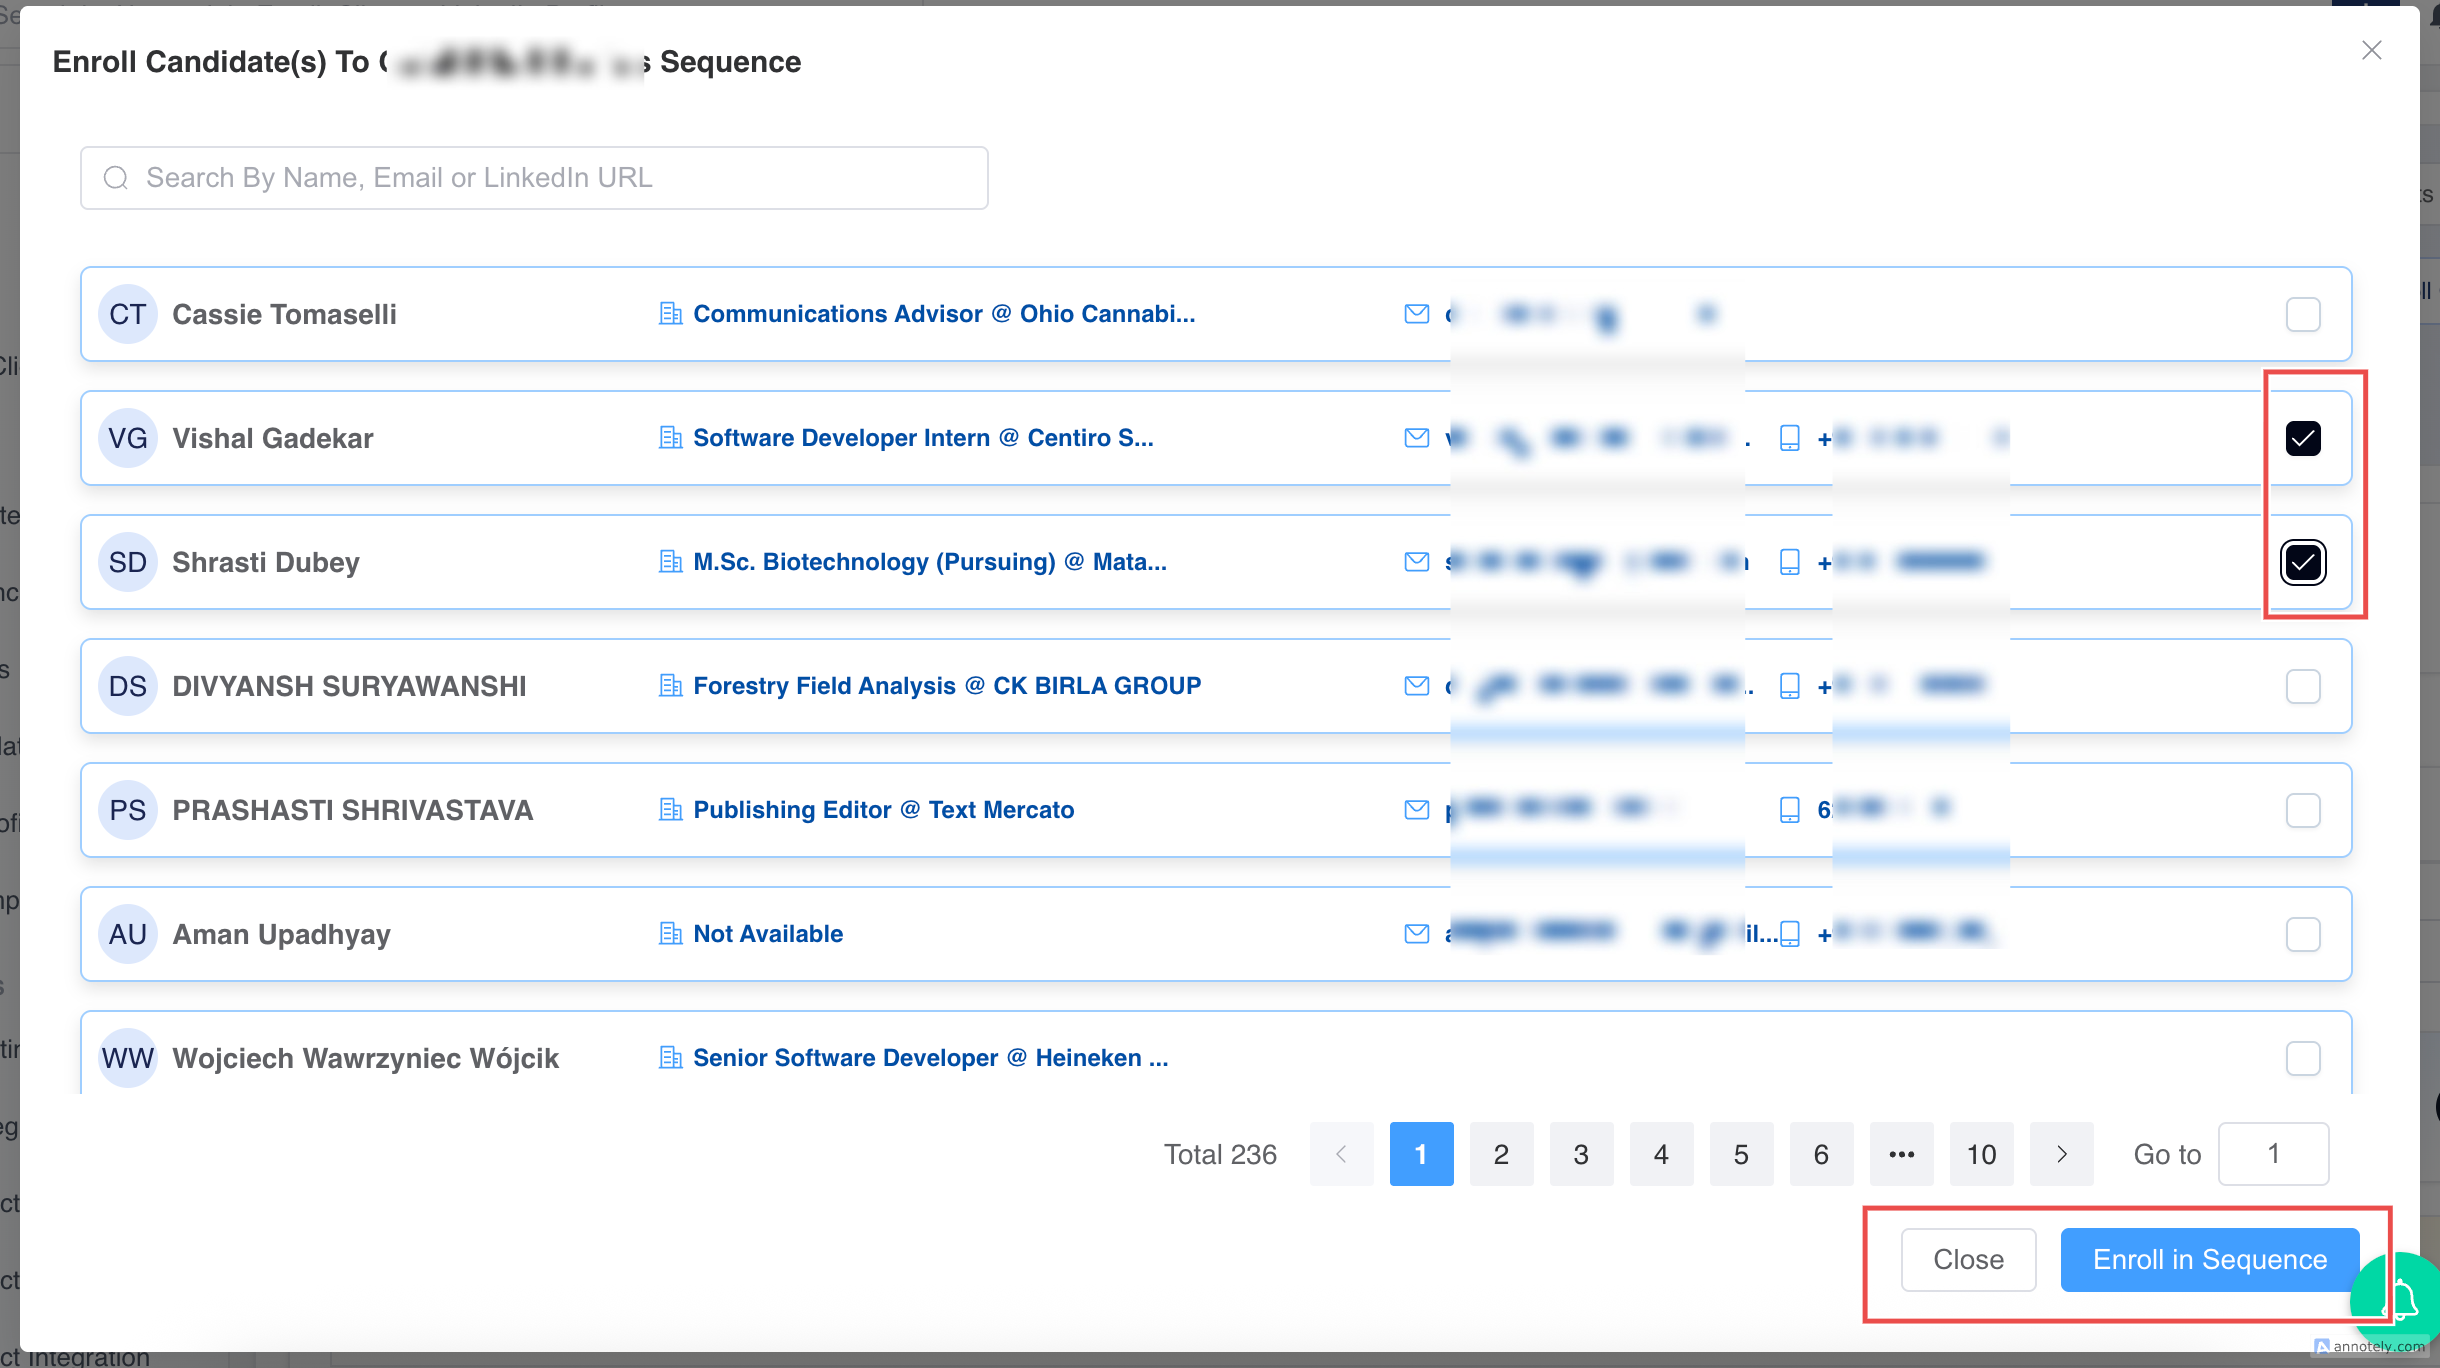
Section titled “1. Go to the Sequence Details Page”- Click on Enroll Contacts/Candidates Button.
- Select the records you want to enroll.
? You can also enroll from the Jobs page — this will include all primary contacts associated with that job.
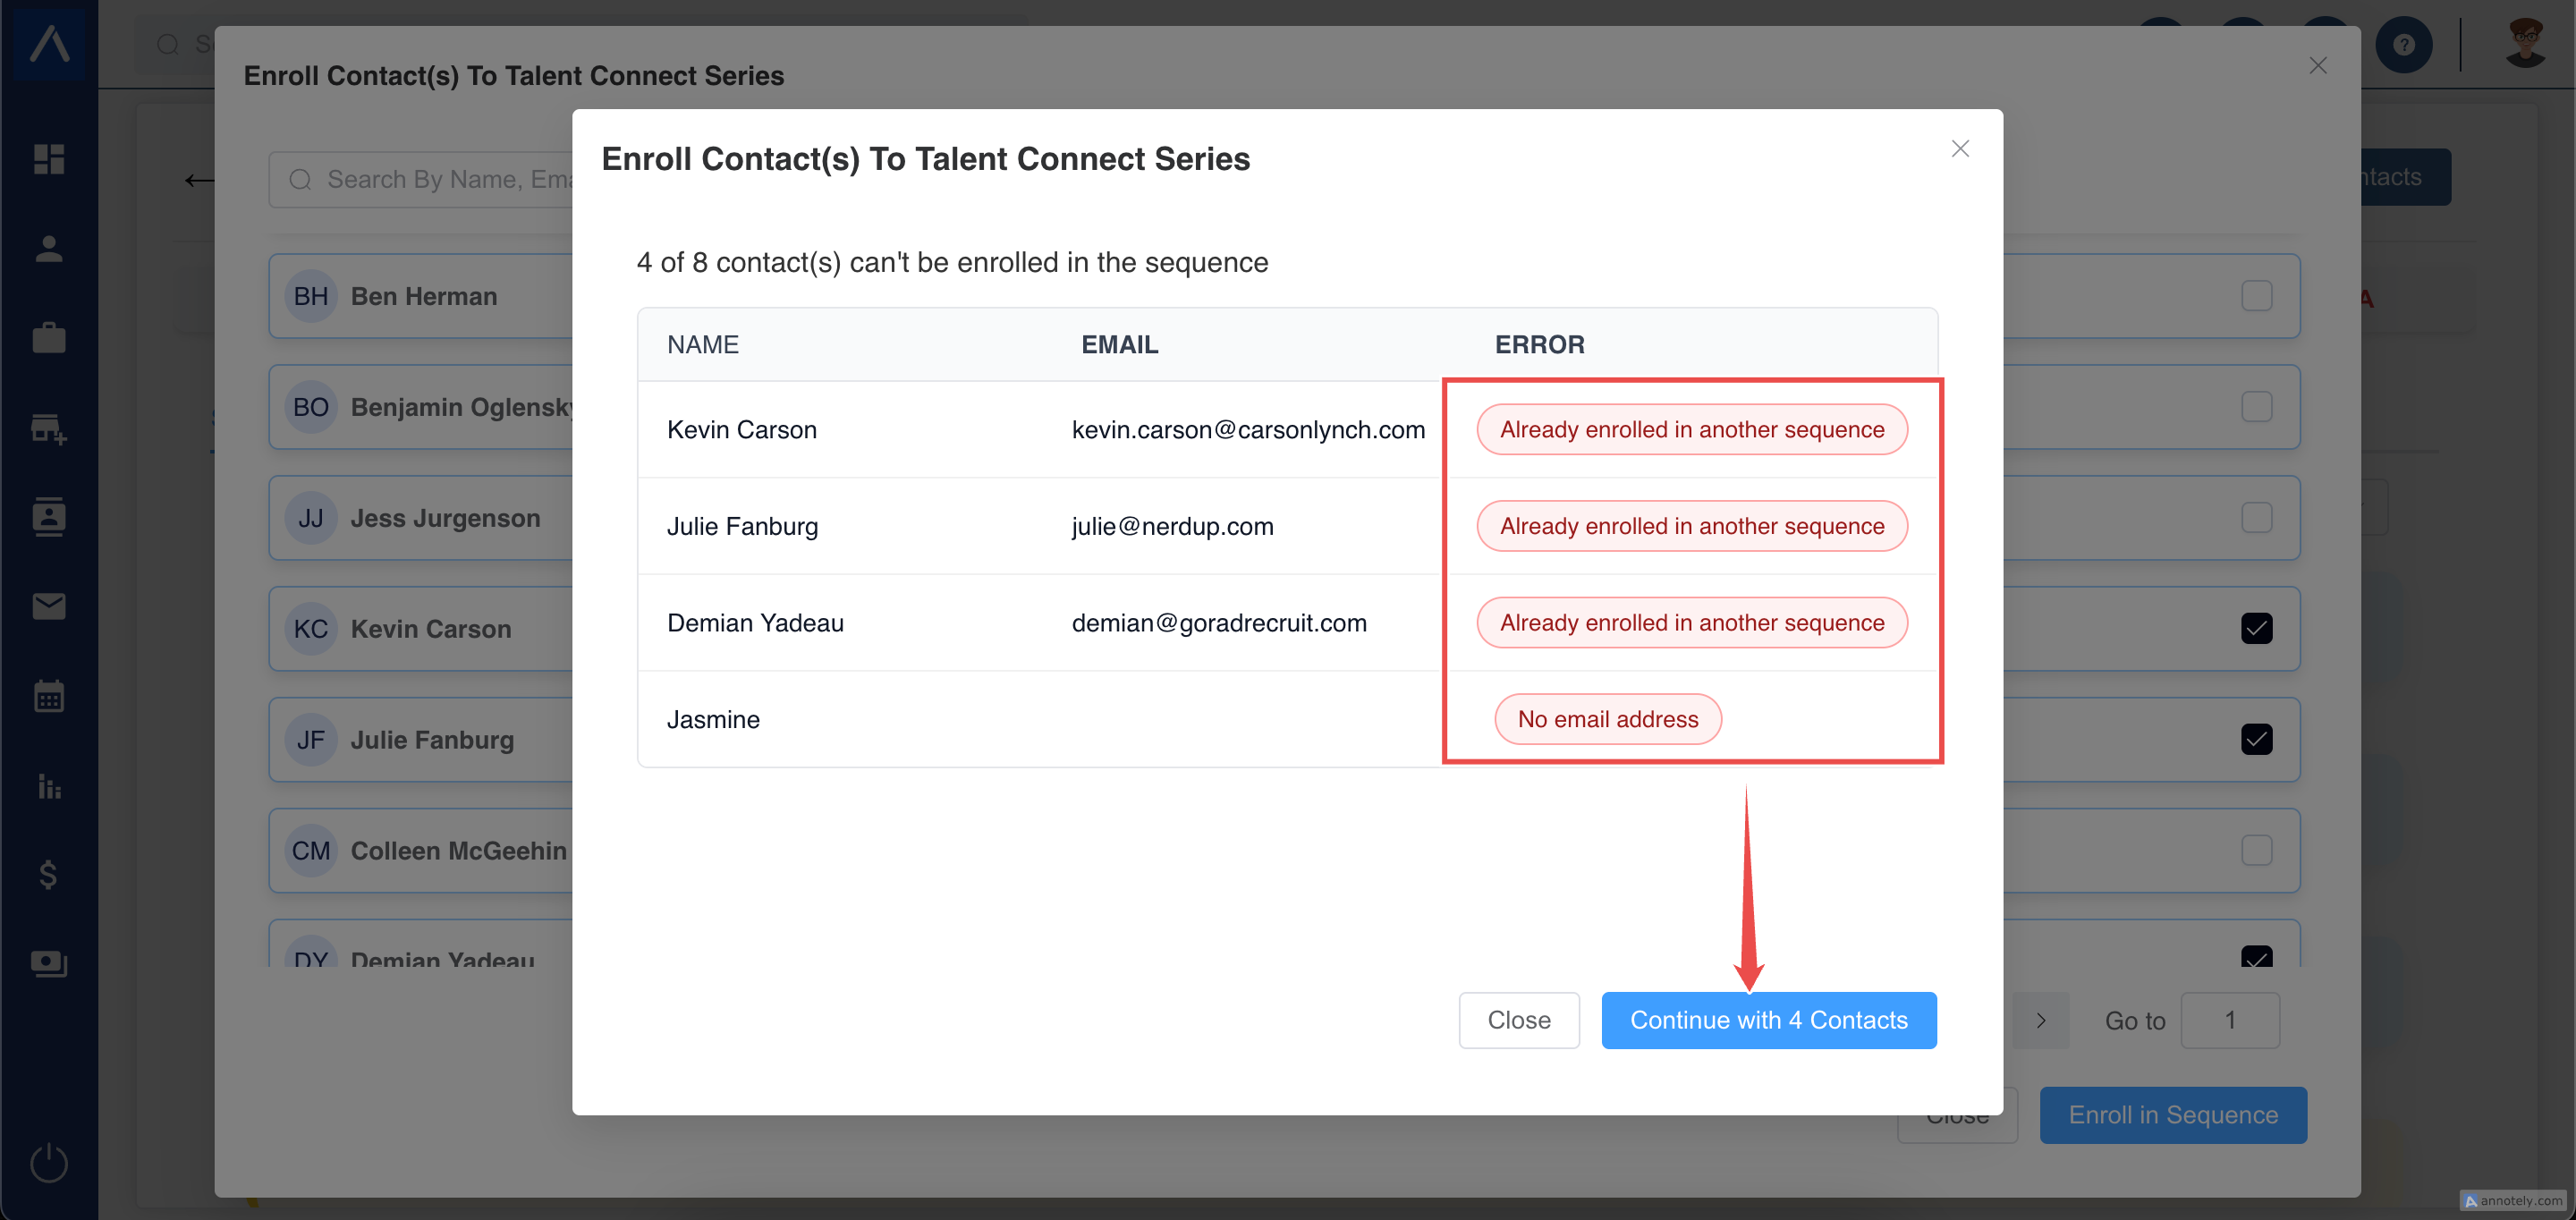
2. Eligibility Check
Section titled “2. Eligibility Check”A pop-up will display selected records excluding:
- Records that have opted out of emails
- Records already enrolled in another sequence
- Records without an email address
3. Edit the Sequence (Optional)
Section titled “3. Edit the Sequence (Optional)”Click the down arrow next to the sequence step to:
- Edit each step (e.g., day intervals, send time)
- Edit Subject, Body, etc
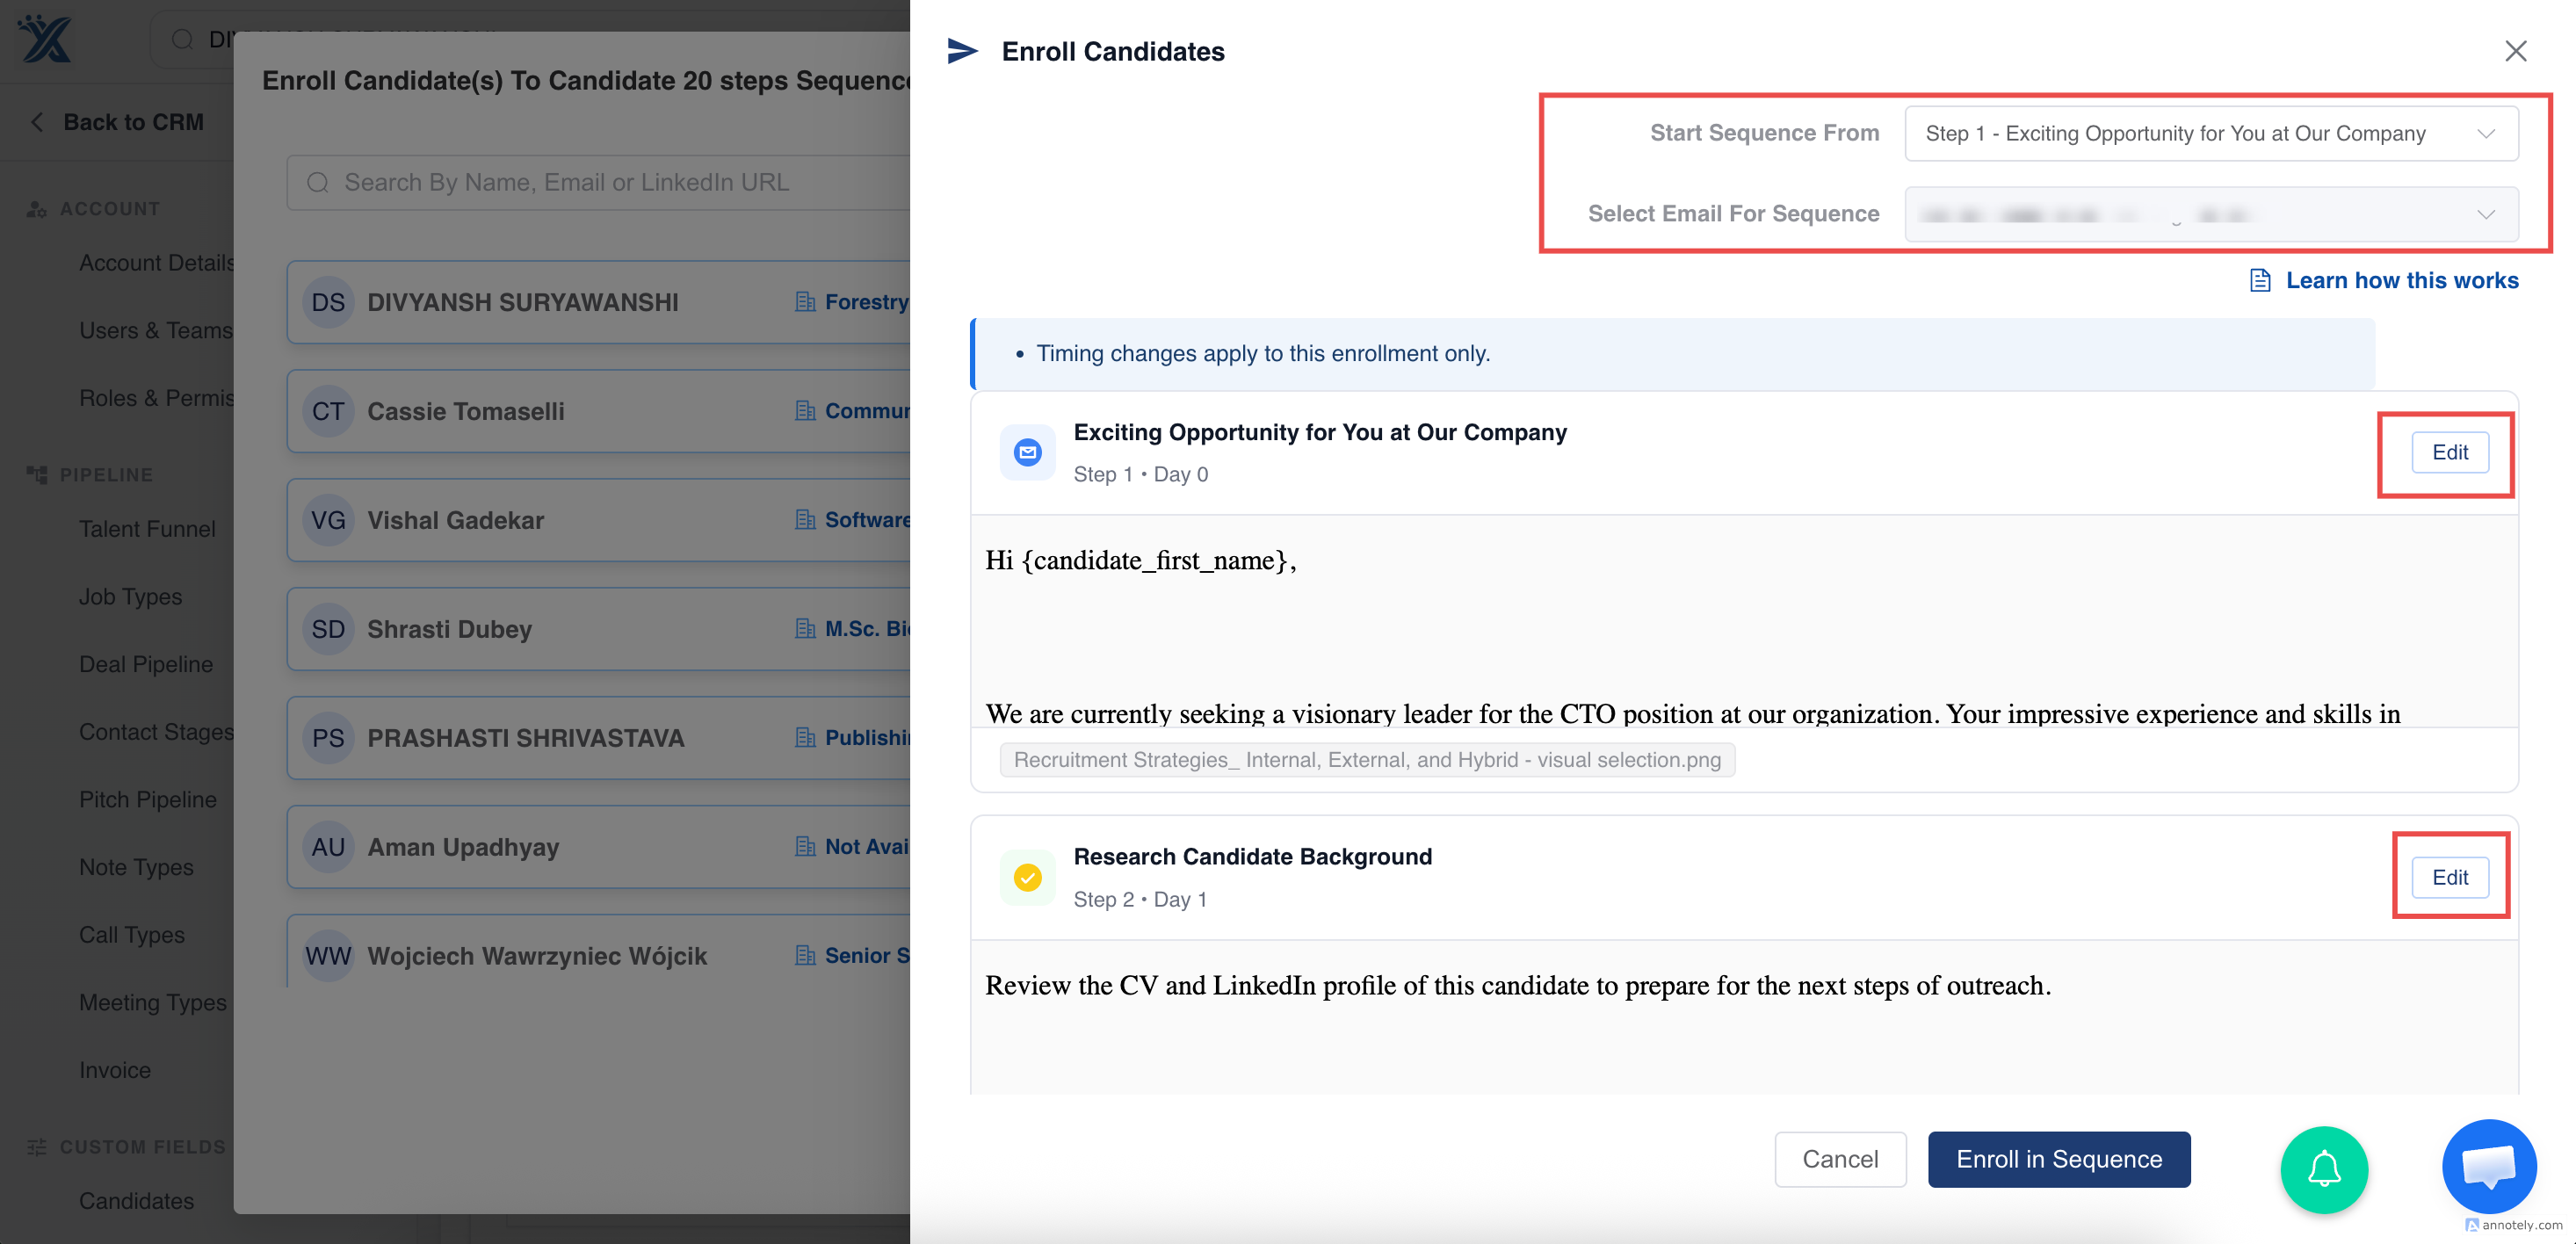
4. Preview Email Placeholders
Section titled “4. Preview Email Placeholders”- Preview dynamic placeholders (e.g., {{First Name}}) for each step.
- These will appear highlighted in red in the preview but not in the actual email.
- For bulk enrollments, the preview will show data from the first selected record.
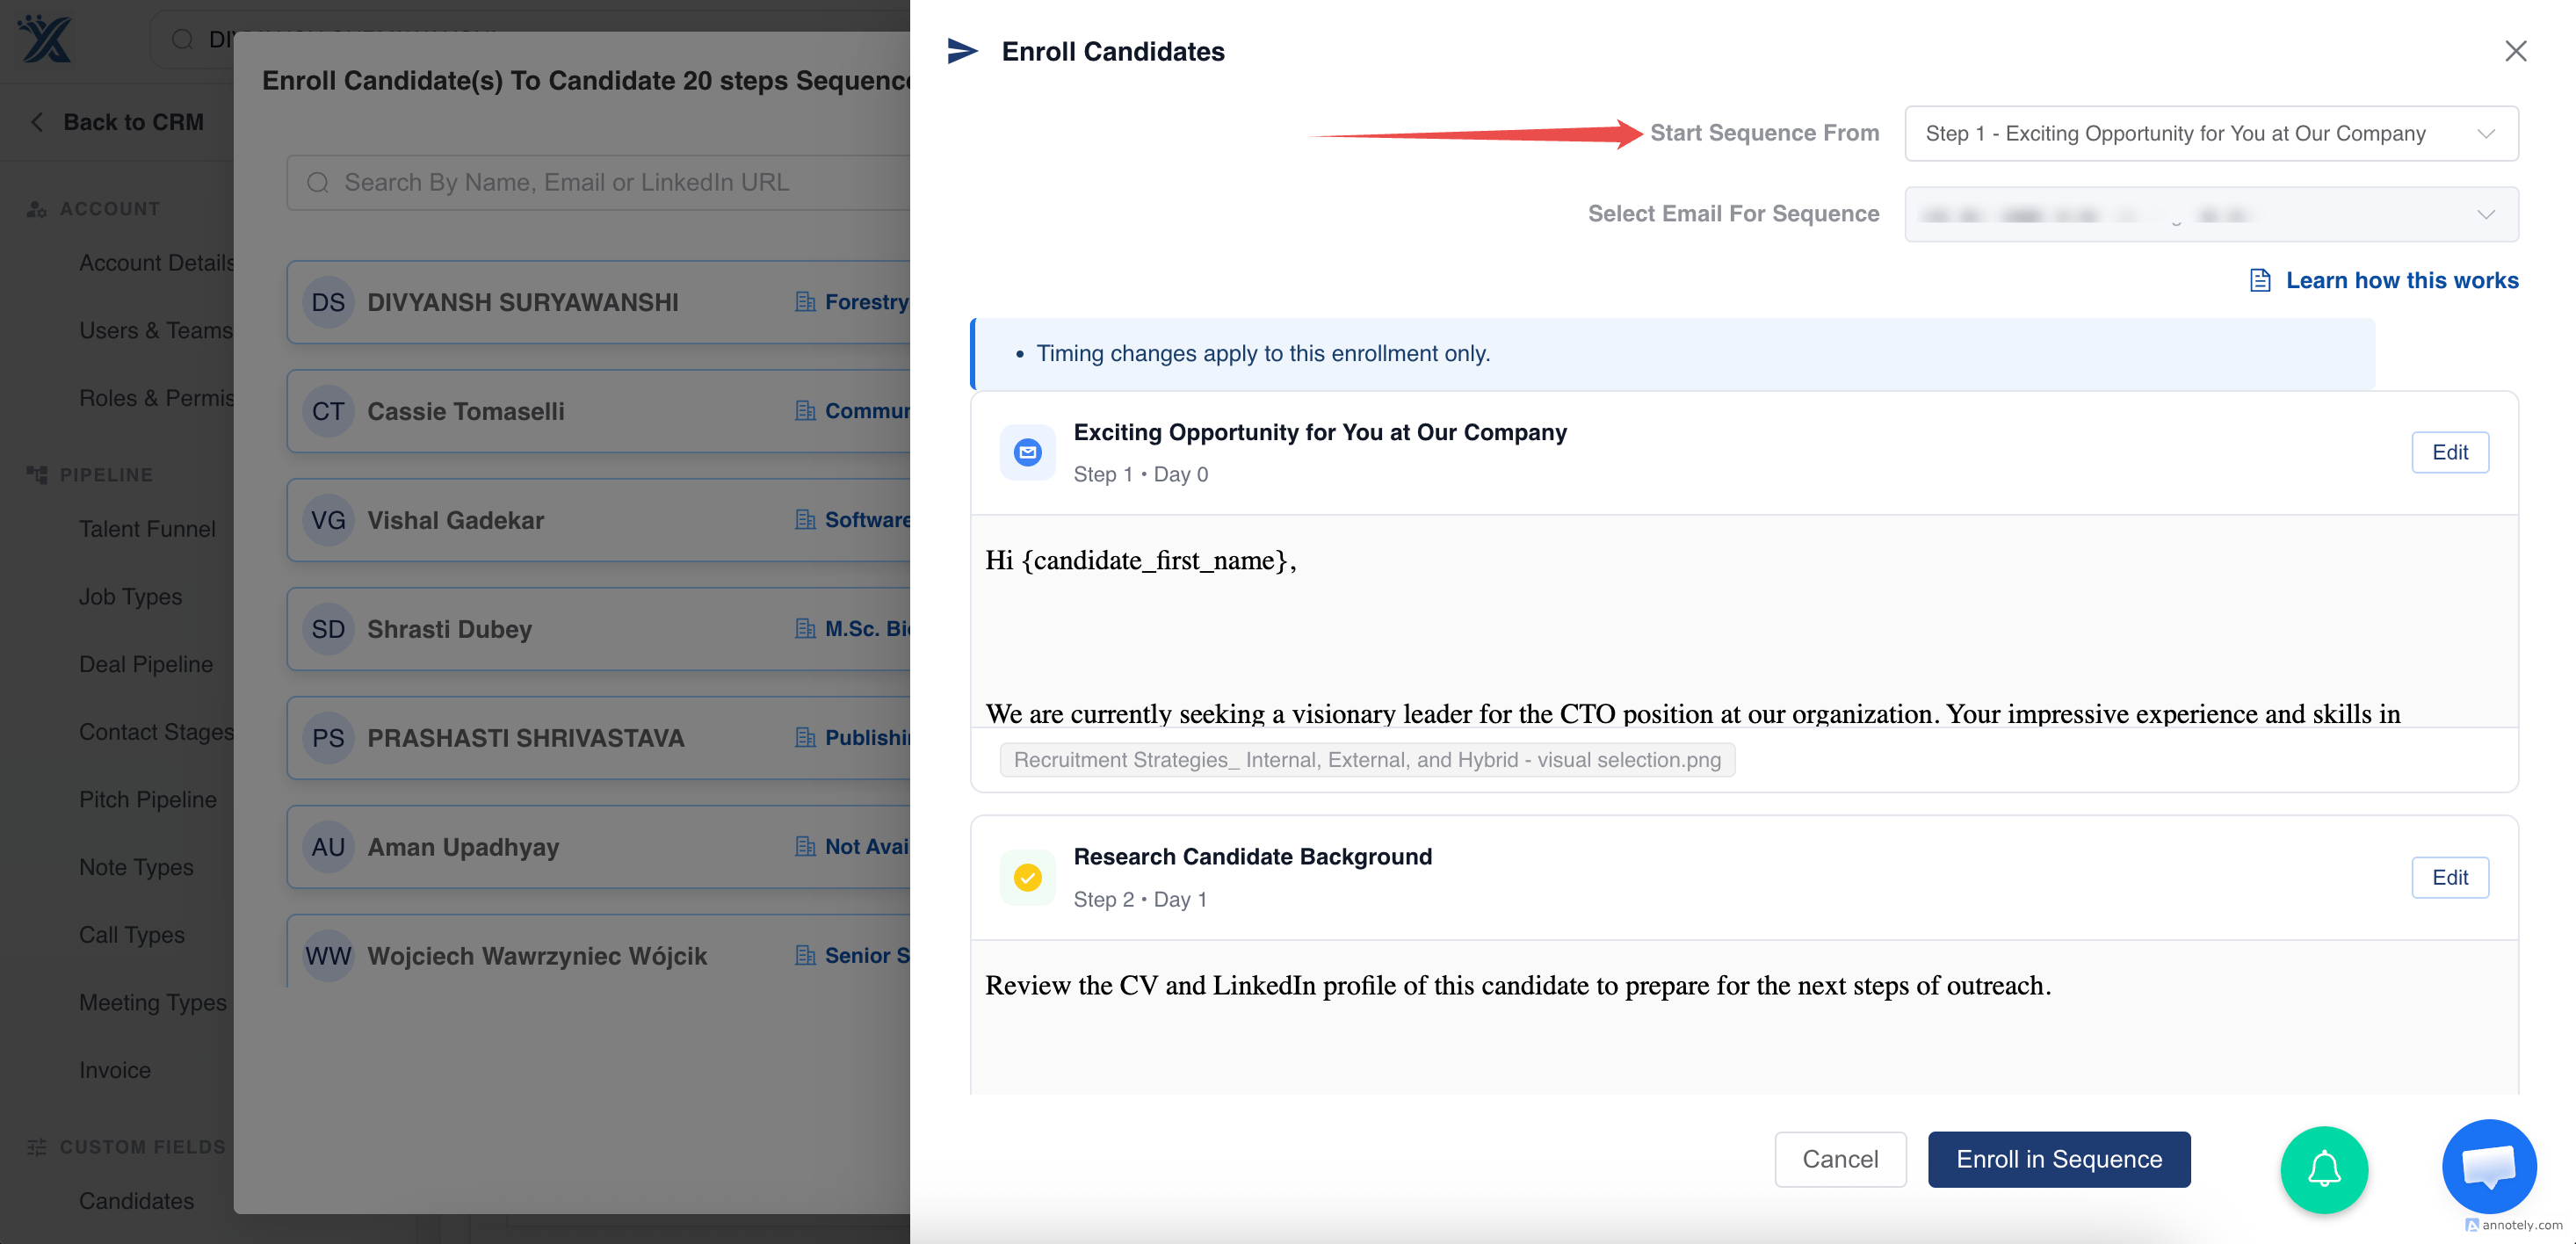
5. Choose the Sending Email & Select a Starting Step
Section titled “5. Choose the Sending Email & Select a Starting Step”If you’ve connected multiple email accounts:
- Choose which email ID the sequence should use.
Use your email integration settings if you need to connect another email account before starting the sequence.
Want to begin from a later step?
- Use the “Start Sequence From” dropdown to skip earlier steps and begin from a specific point in the sequence.
6. Customize for Each Enrollment
Section titled “6. Customize for Each Enrollment”You can:
- Edit the subject and body
- Add attachments
- Customize content for each contact before confirming enrollment
✏️ Customization applies only to steps that haven’t yet been executed.
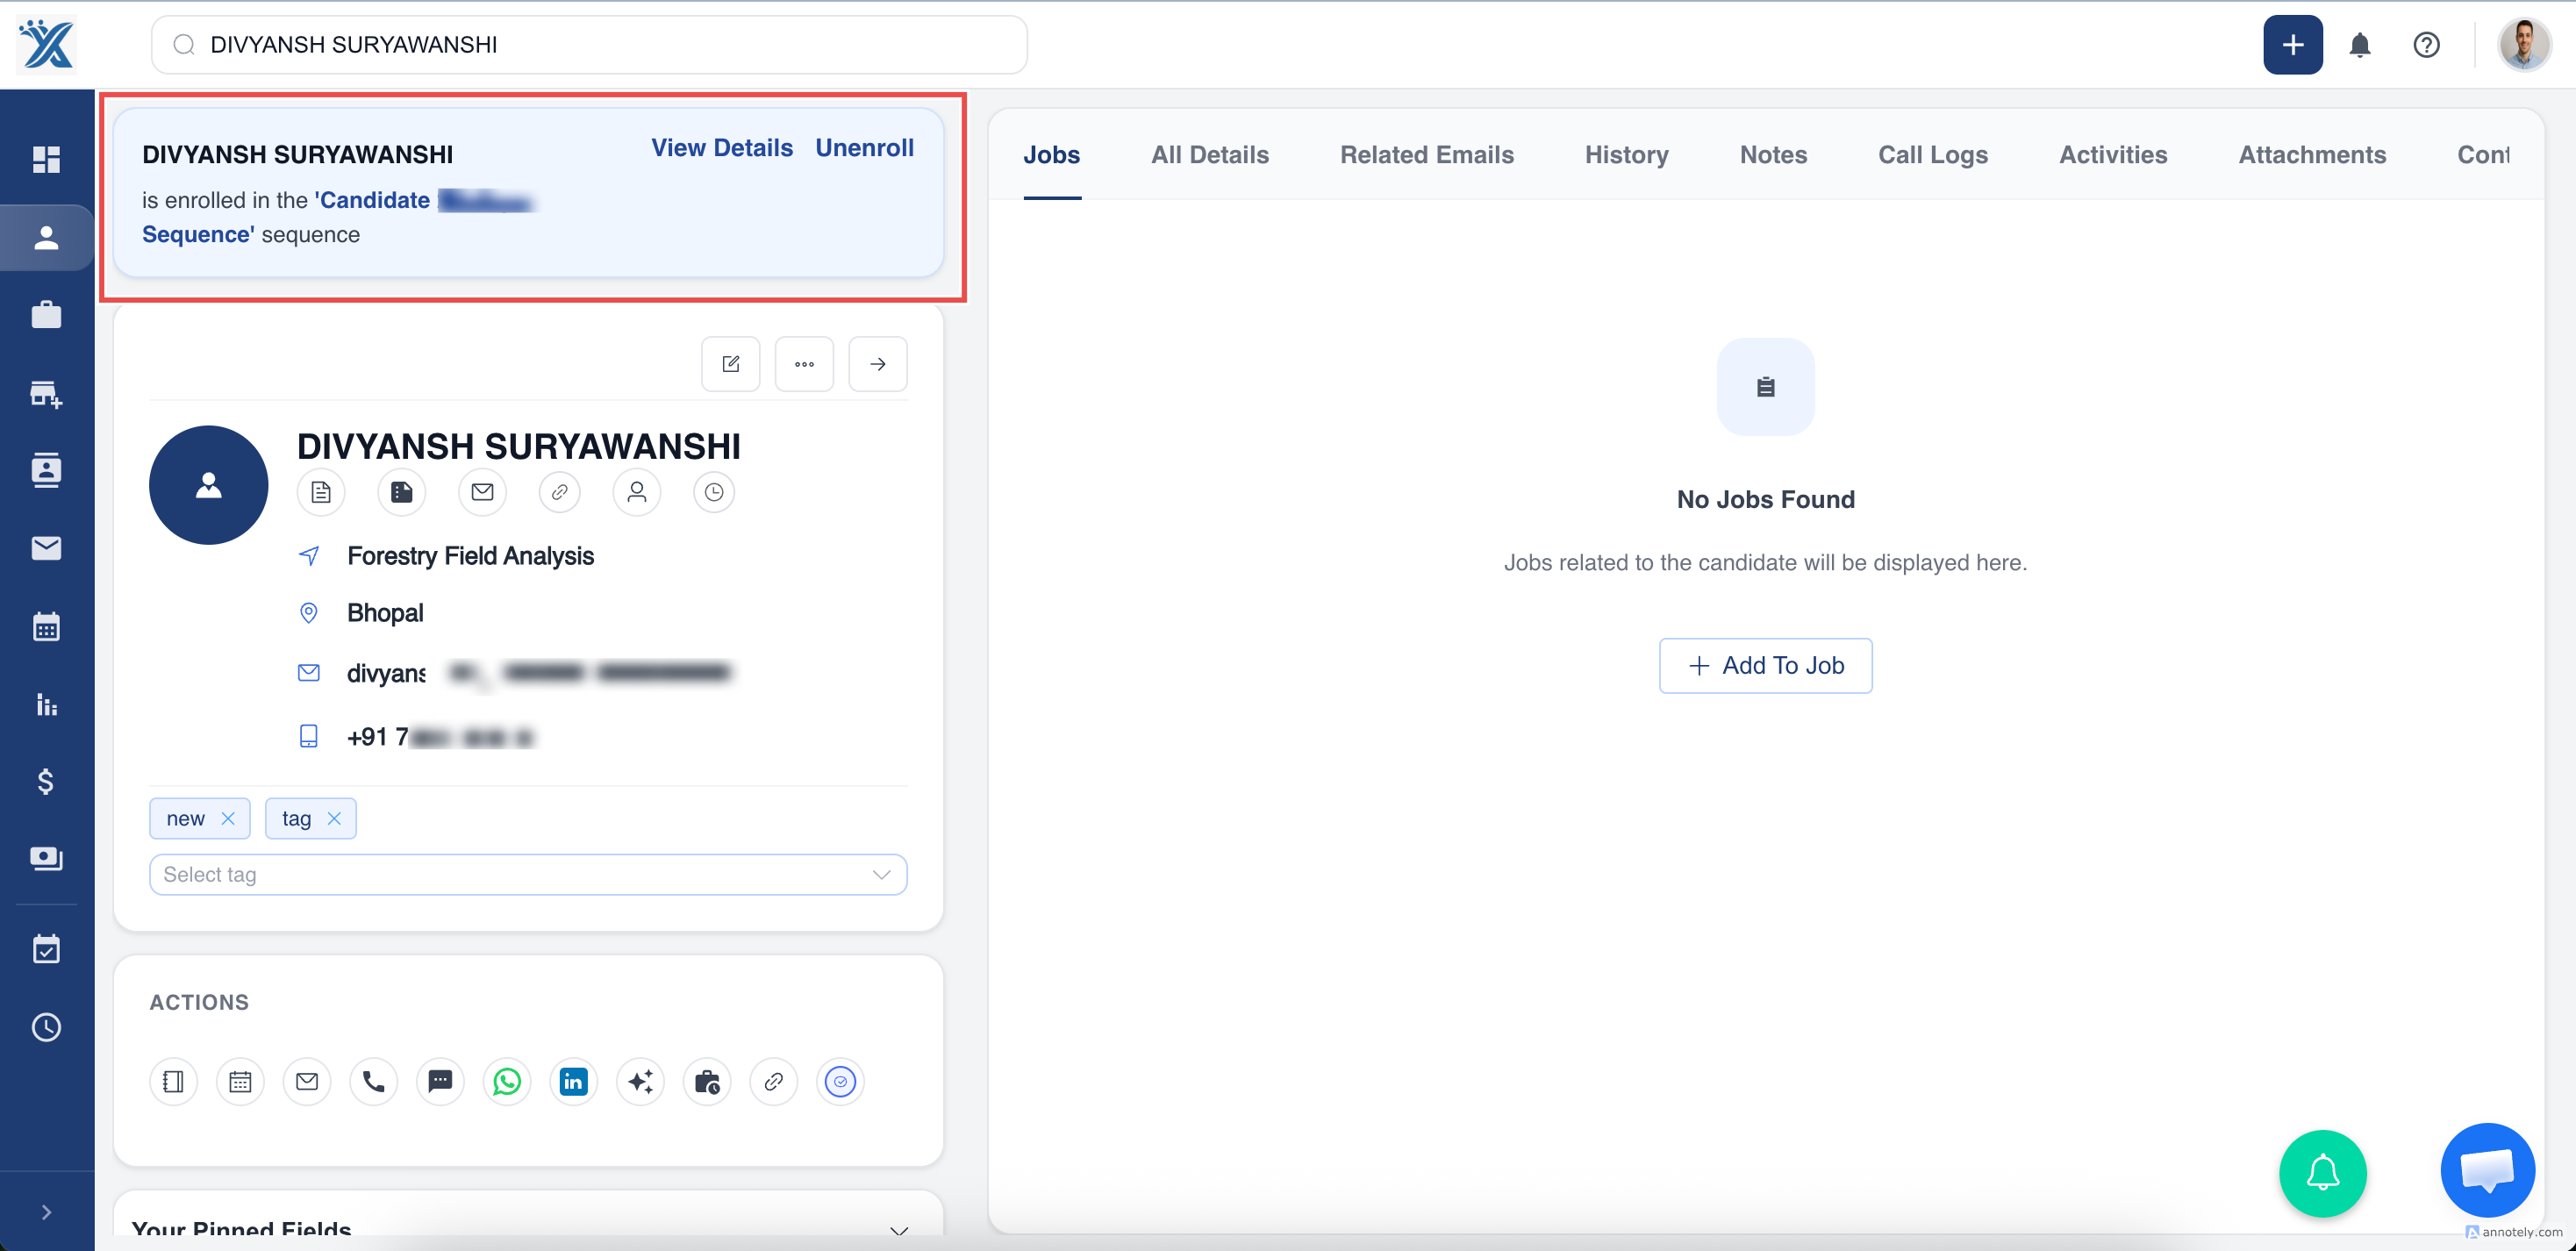
7. Track Enrollment Status
Section titled “7. Track Enrollment Status”Once enrolled, a banner will appear on the candidate/contact’s profile page indicating:
- The name of the sequence
- Their current status within it
8. Editing a Running Sequence
Section titled “8. Editing a Running Sequence”If someone edits a sequence already in use:
- Changes will apply only to new enrollments
- Existing enrollments will remain unaffected
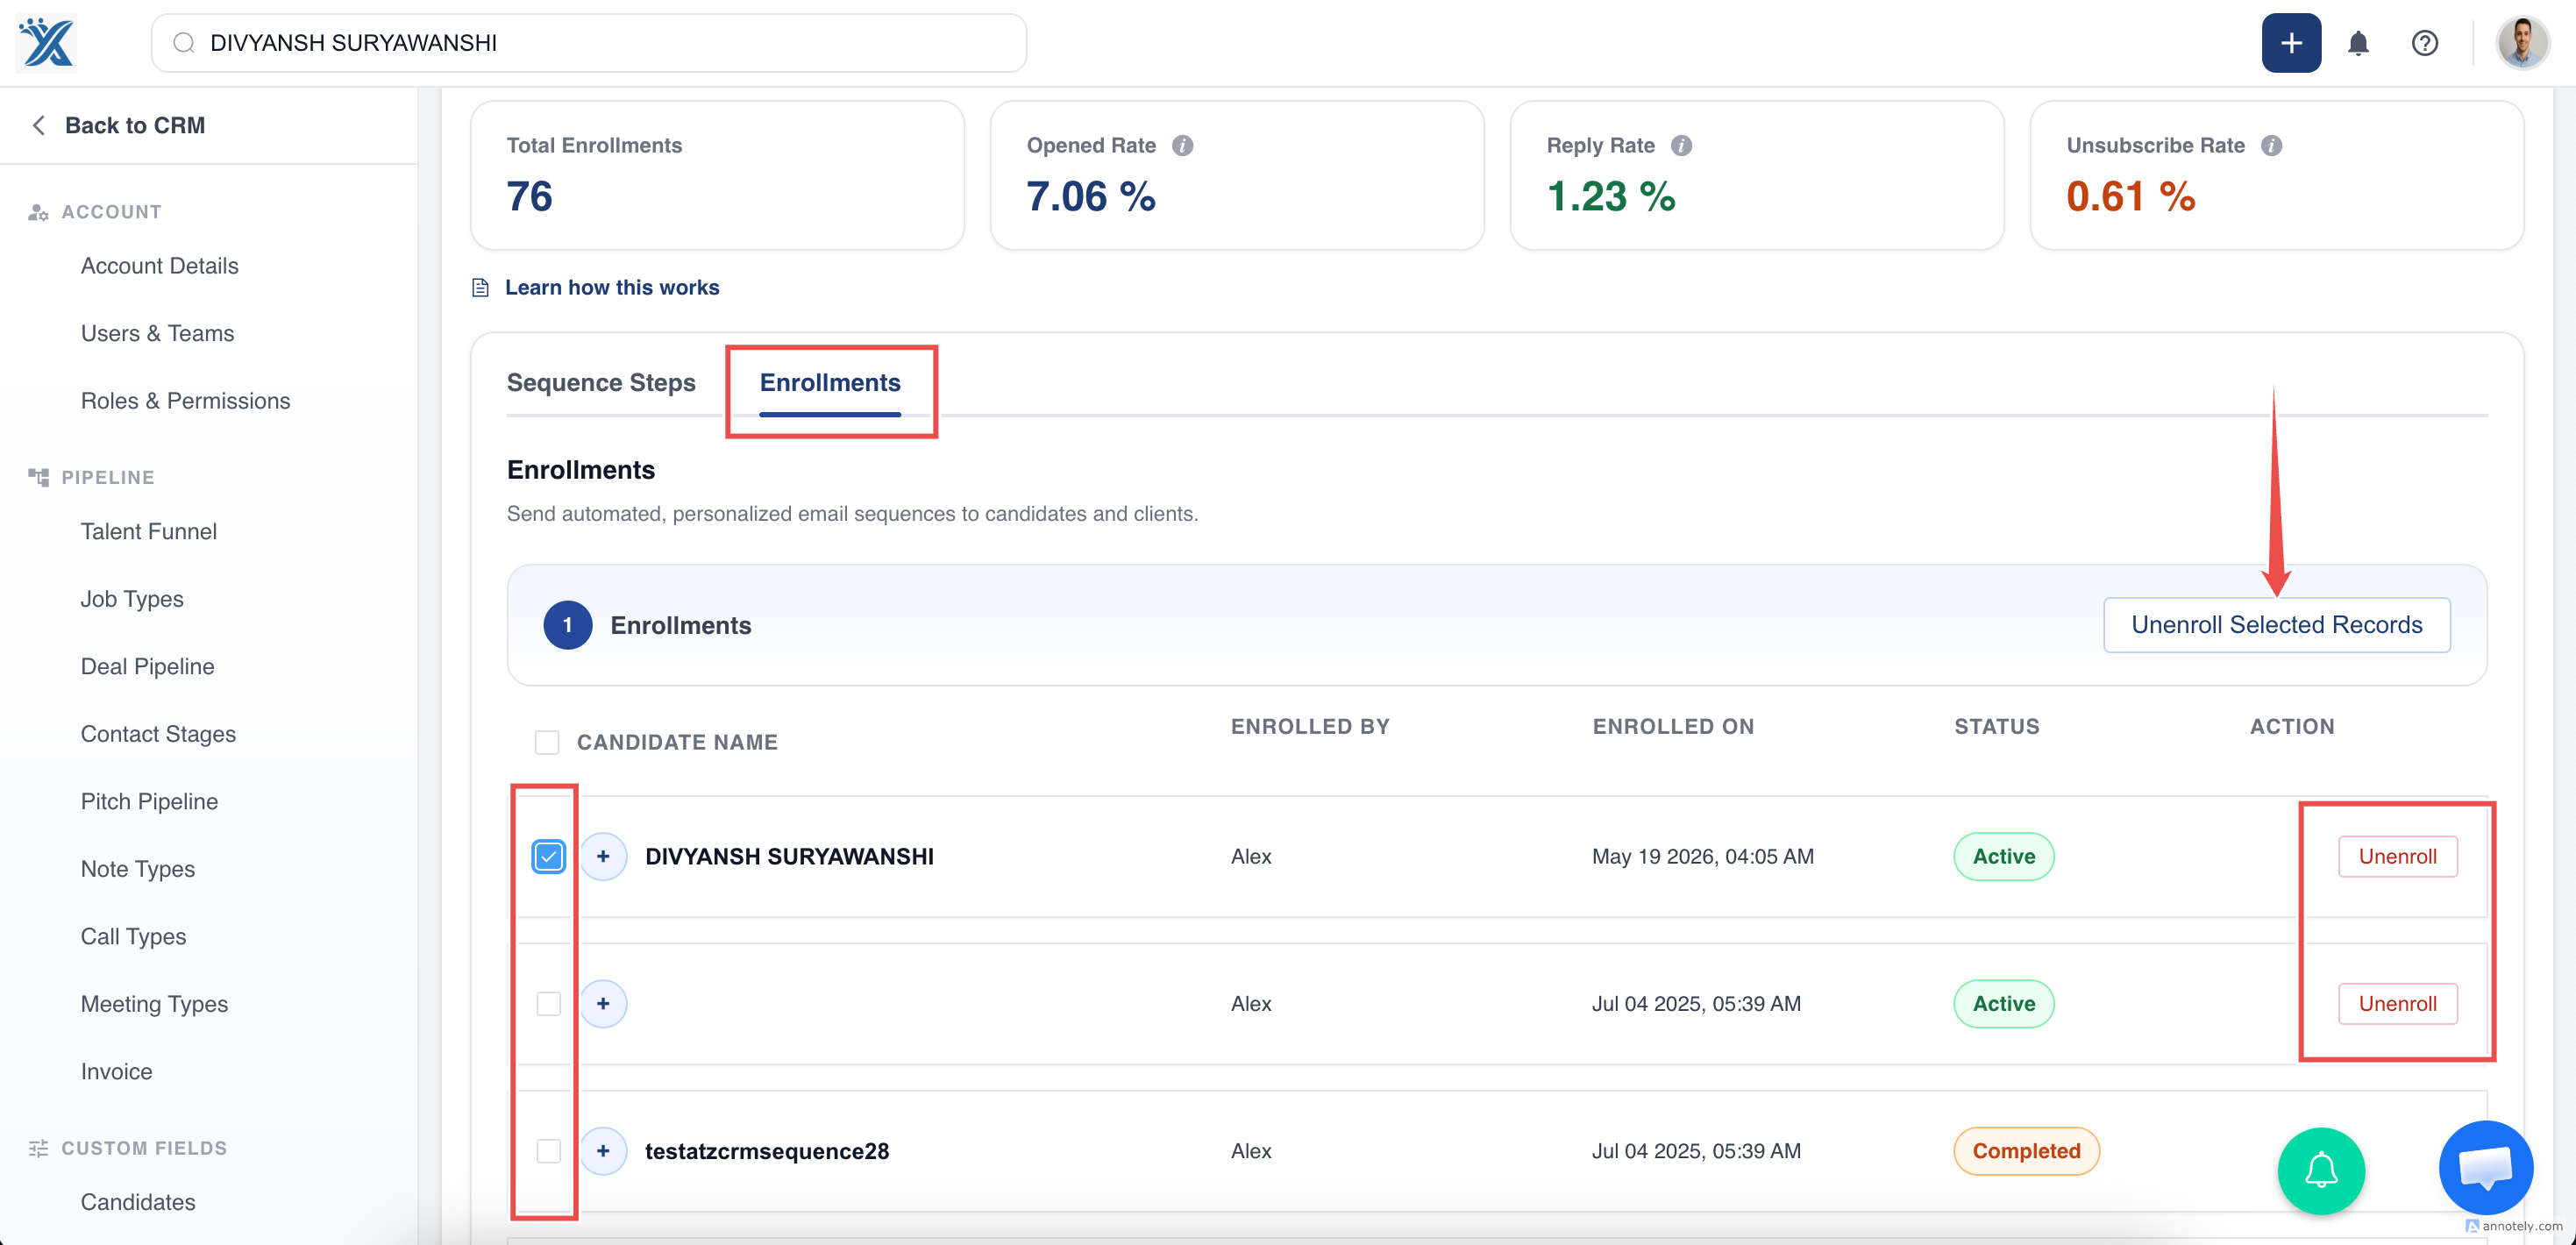
##? Unenrolling Contacts from a Sequence A candidate/contact will be automatically unenrolled from a sequence when:
- They reply to any email in the sequence
- They opt out via the unsubscribe link
- You manually unenroll them from the sequence
Alternatively, you can also unenroll the candidates/contacts from the candidate’s/contact’s detailed page.

✉️ Email Settings Requirement for Sequence Enrollment
Section titled “✉️ Email Settings Requirement for Sequence Enrollment”The user initiating the enrollment must have their email account connected to ATZ CRM.
This is essential because all sequence emails are sent using that user’s email settings.
Without a connected email account, the sequence cannot be triggered for the selected contacts or candidates.
? Managing Active Sequence Enrollments
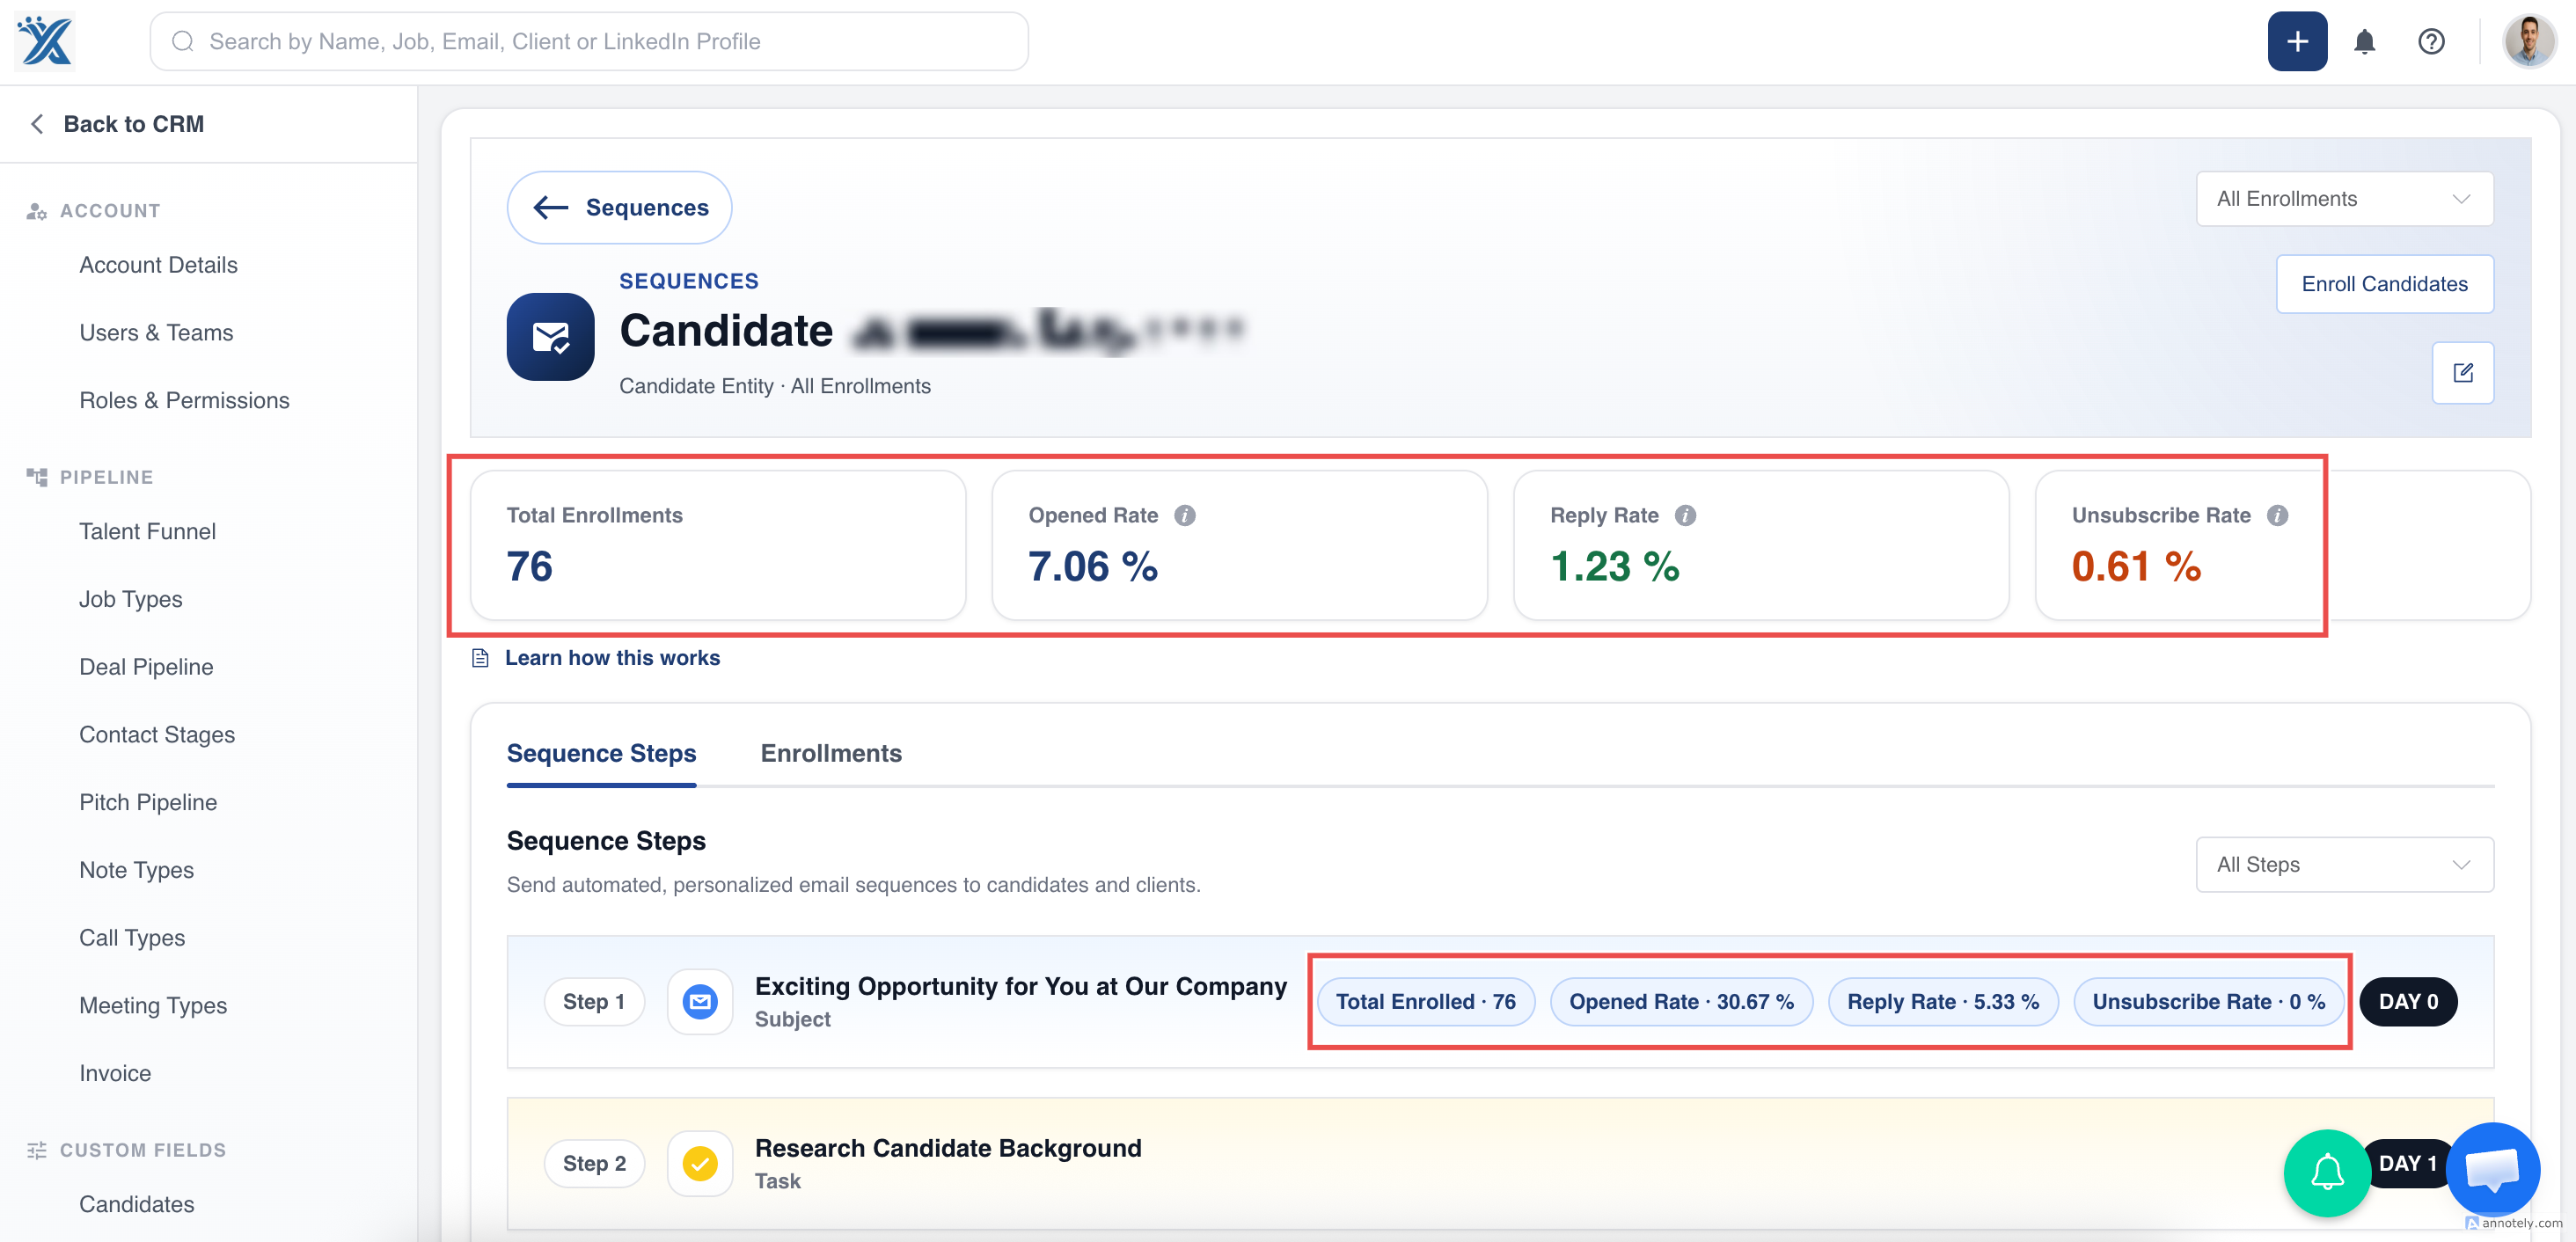
Section titled “? Managing Active Sequence Enrollments”To keep track of your sequence activity, you can view your current enrollments directly within the Email Sequence Detail Page.
What You’ll See:
Section titled “What You’ll See:”- The total number of records currently enrolled in sequences.
- The remaining quota available for new enrollments based on your plan and user limits.
- Stats about your Email Sequence and Individual Step
This helps ensure you stay within the allowed enrollment limit and manage your outreach effectively.
Hope this help:)