
How to Create and Customize Invoices in ATZ CRM
This help article walks you through how to create an invoice for a placed candidate in ATZ CRM and customize its appearance.
When Does an Invoice Appear?
Section titled “When Does an Invoice Appear?”An invoice appears in the Placements & Billing section after a candidate is moved to the Hired stage and billing is started.
Steps to Create an Invoice
Section titled “Steps to Create an Invoice”Step 1: Move Candidate to the Hired Stage
Section titled “Step 1: Move Candidate to the Hired Stage”-
Go to the Job under which the candidate is listed.
-
Select the candidate.
-
Change their stage to Hired.


- This will register the candidate in the Placements & Billing section.
Step 2: Open Placements & Billing
Section titled “Step 2: Open Placements & Billing”- Navigate to the Placements & Billing section.
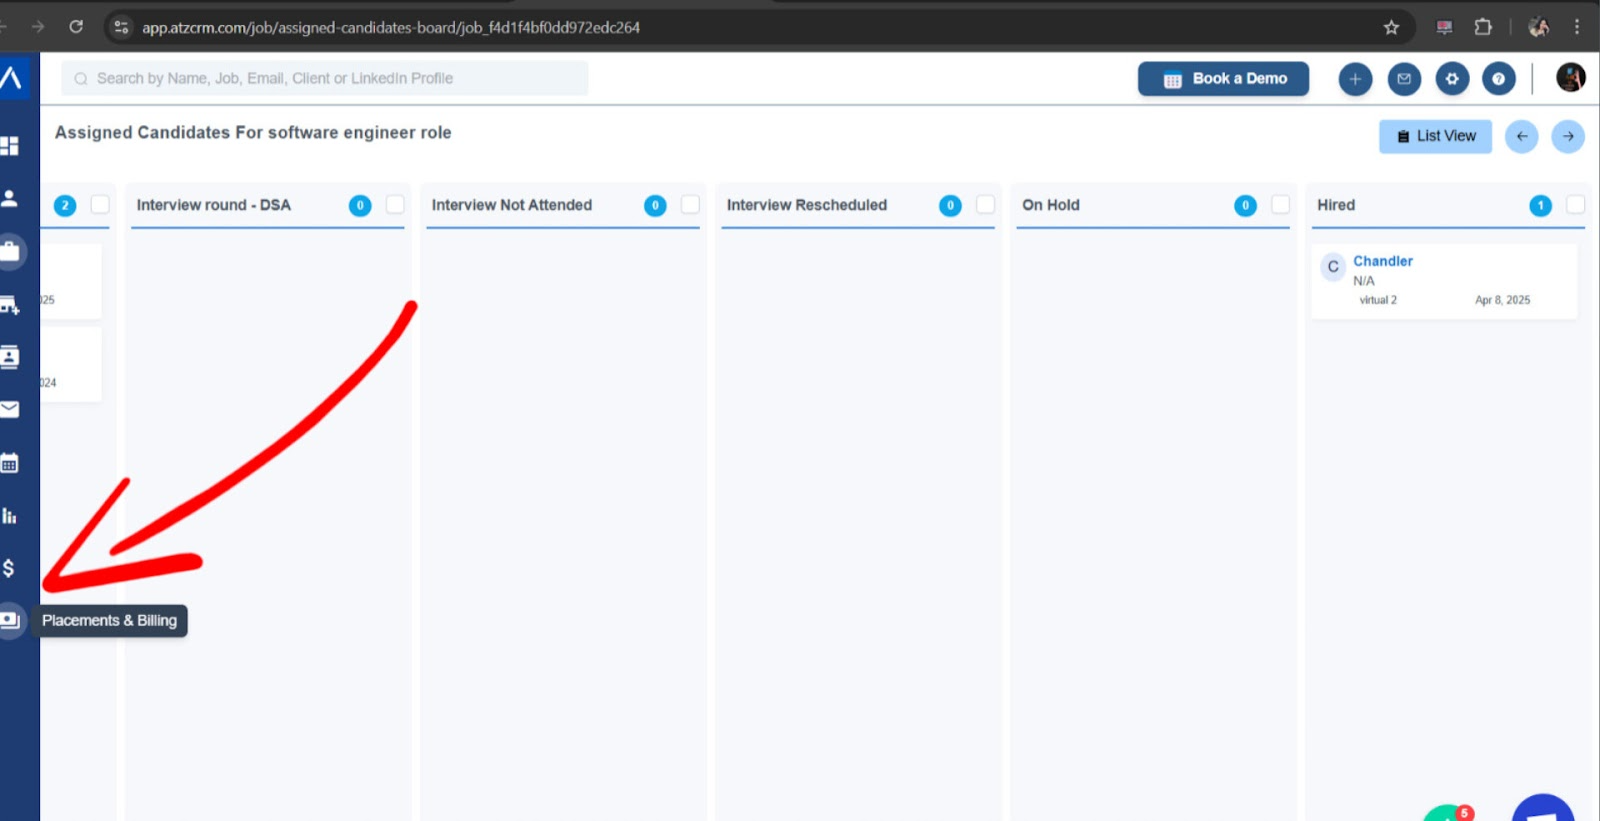
- Find the candidate using their name, job title, or client name.
Step 3: Start Billing
Section titled “Step 3: Start Billing”- Click the Start Billing button next to the candidate.

- Fill in the billing details:
- Billing Amount
- Deposit
- Tax
- Joining Date
- Invoice Due Date
- Description (optional)
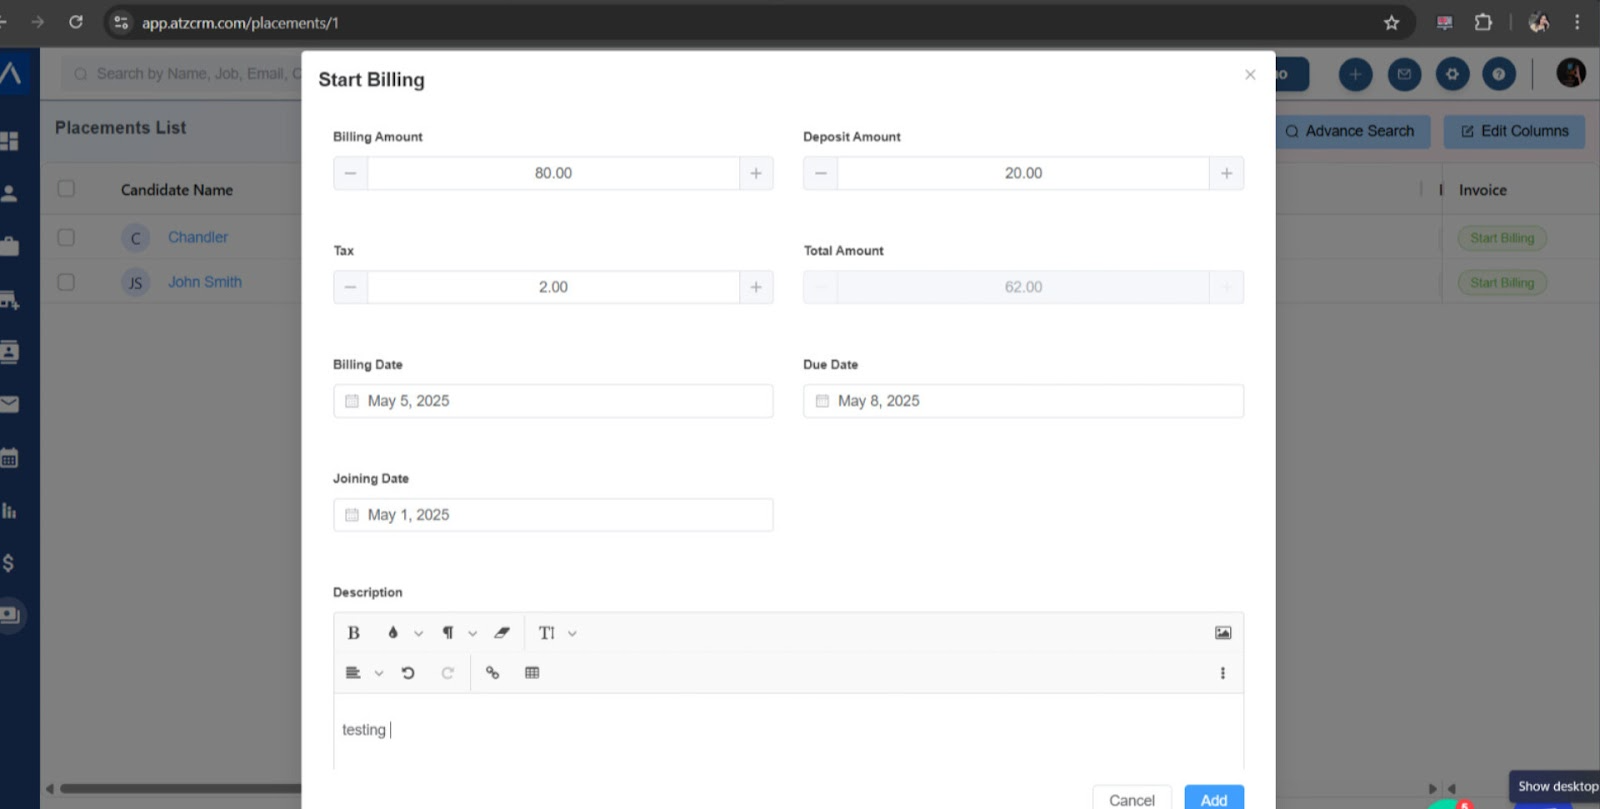
- Submit the form to generate the invoice.
The description you enter here will appear on the invoice and is specific to this billing record.
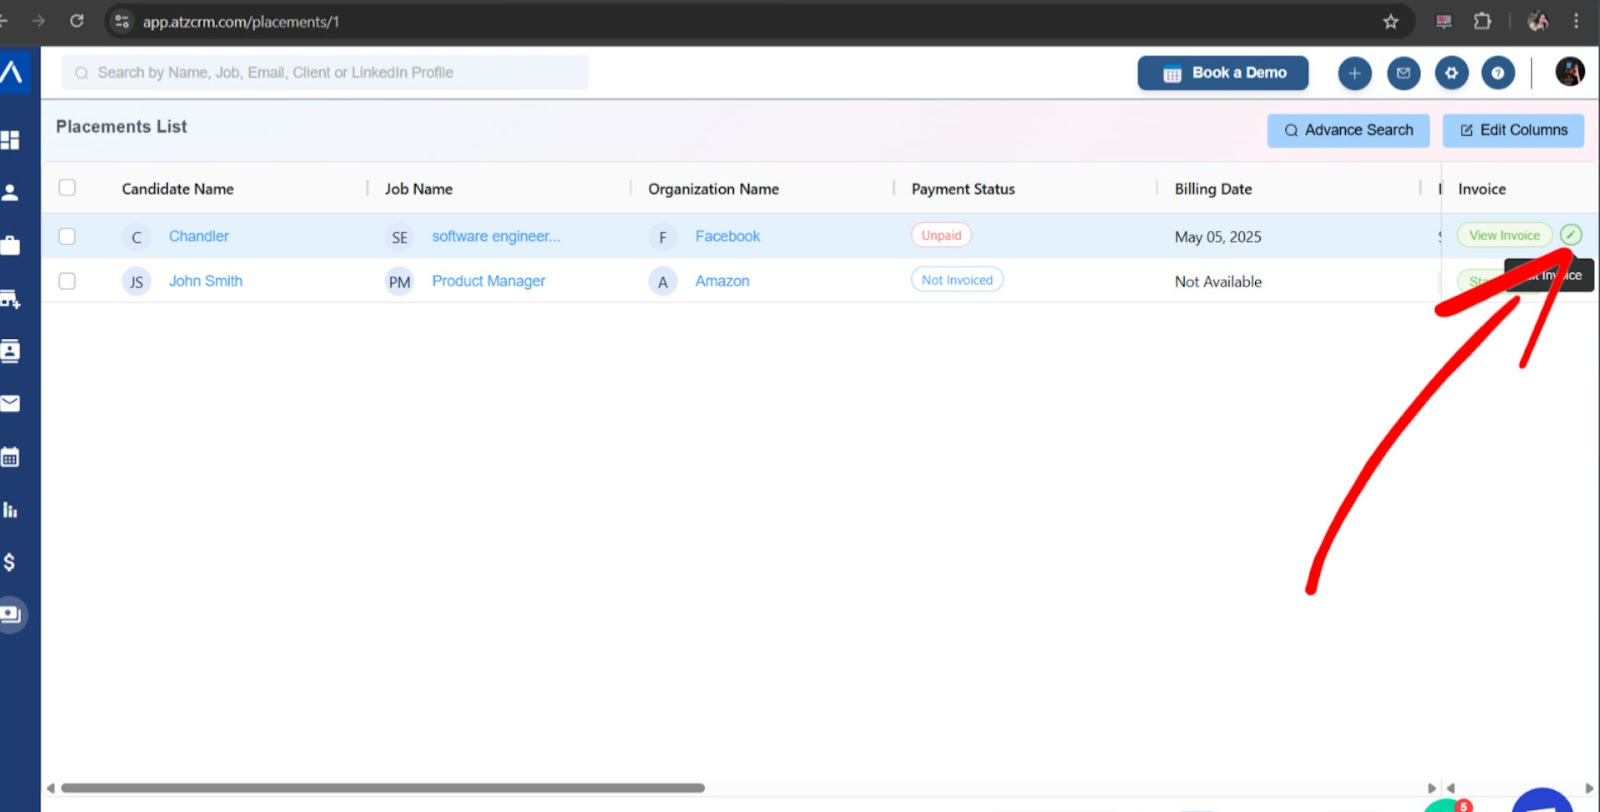
View and Edit Invoice
Section titled “View and Edit Invoice”After the invoice is created:
- Use the View Invoice button to preview it.

- Most fields like billing amount, tax, and due date can be edited later.
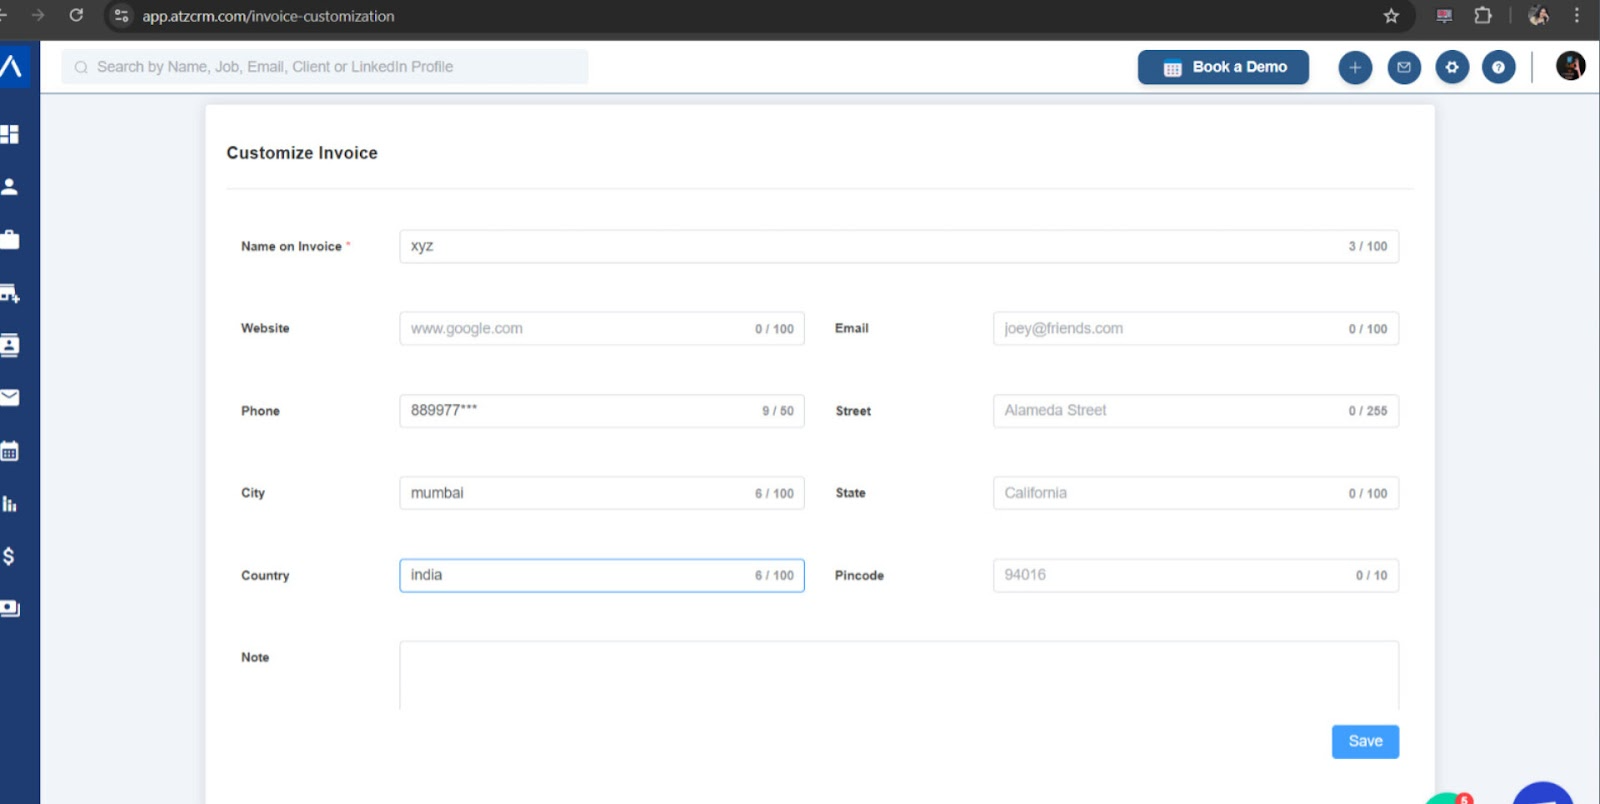
Customizing Invoice Format (Admin Settings)
Section titled “Customizing Invoice Format (Admin Settings)”Admins can adjust the layout and static content of all invoices through the Customized Invoice section.
To customize:
Section titled “To customize:”-
Go to Admin Settings → Customized Invoice.
-
You can:
- Rename the Invoice Title
- Edit Terms or Notes
- Upload or change the Company Logo
If you need further assistance, Feel free to reach out to our chat support team anytime — we’re here to assist you
Hope this help:)