
Resume/CV Formatting
Manually reformatting resumes to include your logo, contact details, and brand styling can take hours — especially when clients have strict requirements. With our CV Formatting feature, you can personalize and standardize resumes in just a few clicks.
You can easily:
- Add a custom header, footer, and watermark to every resume you send.
- Redact sensitive details (like candidate names or contact info) before sharing with clients.
Note: The Resume/CV Formatting feature, including Text Redaction and custom templates, is available on the Business Plan and above.
How to Format Resumes/CVs
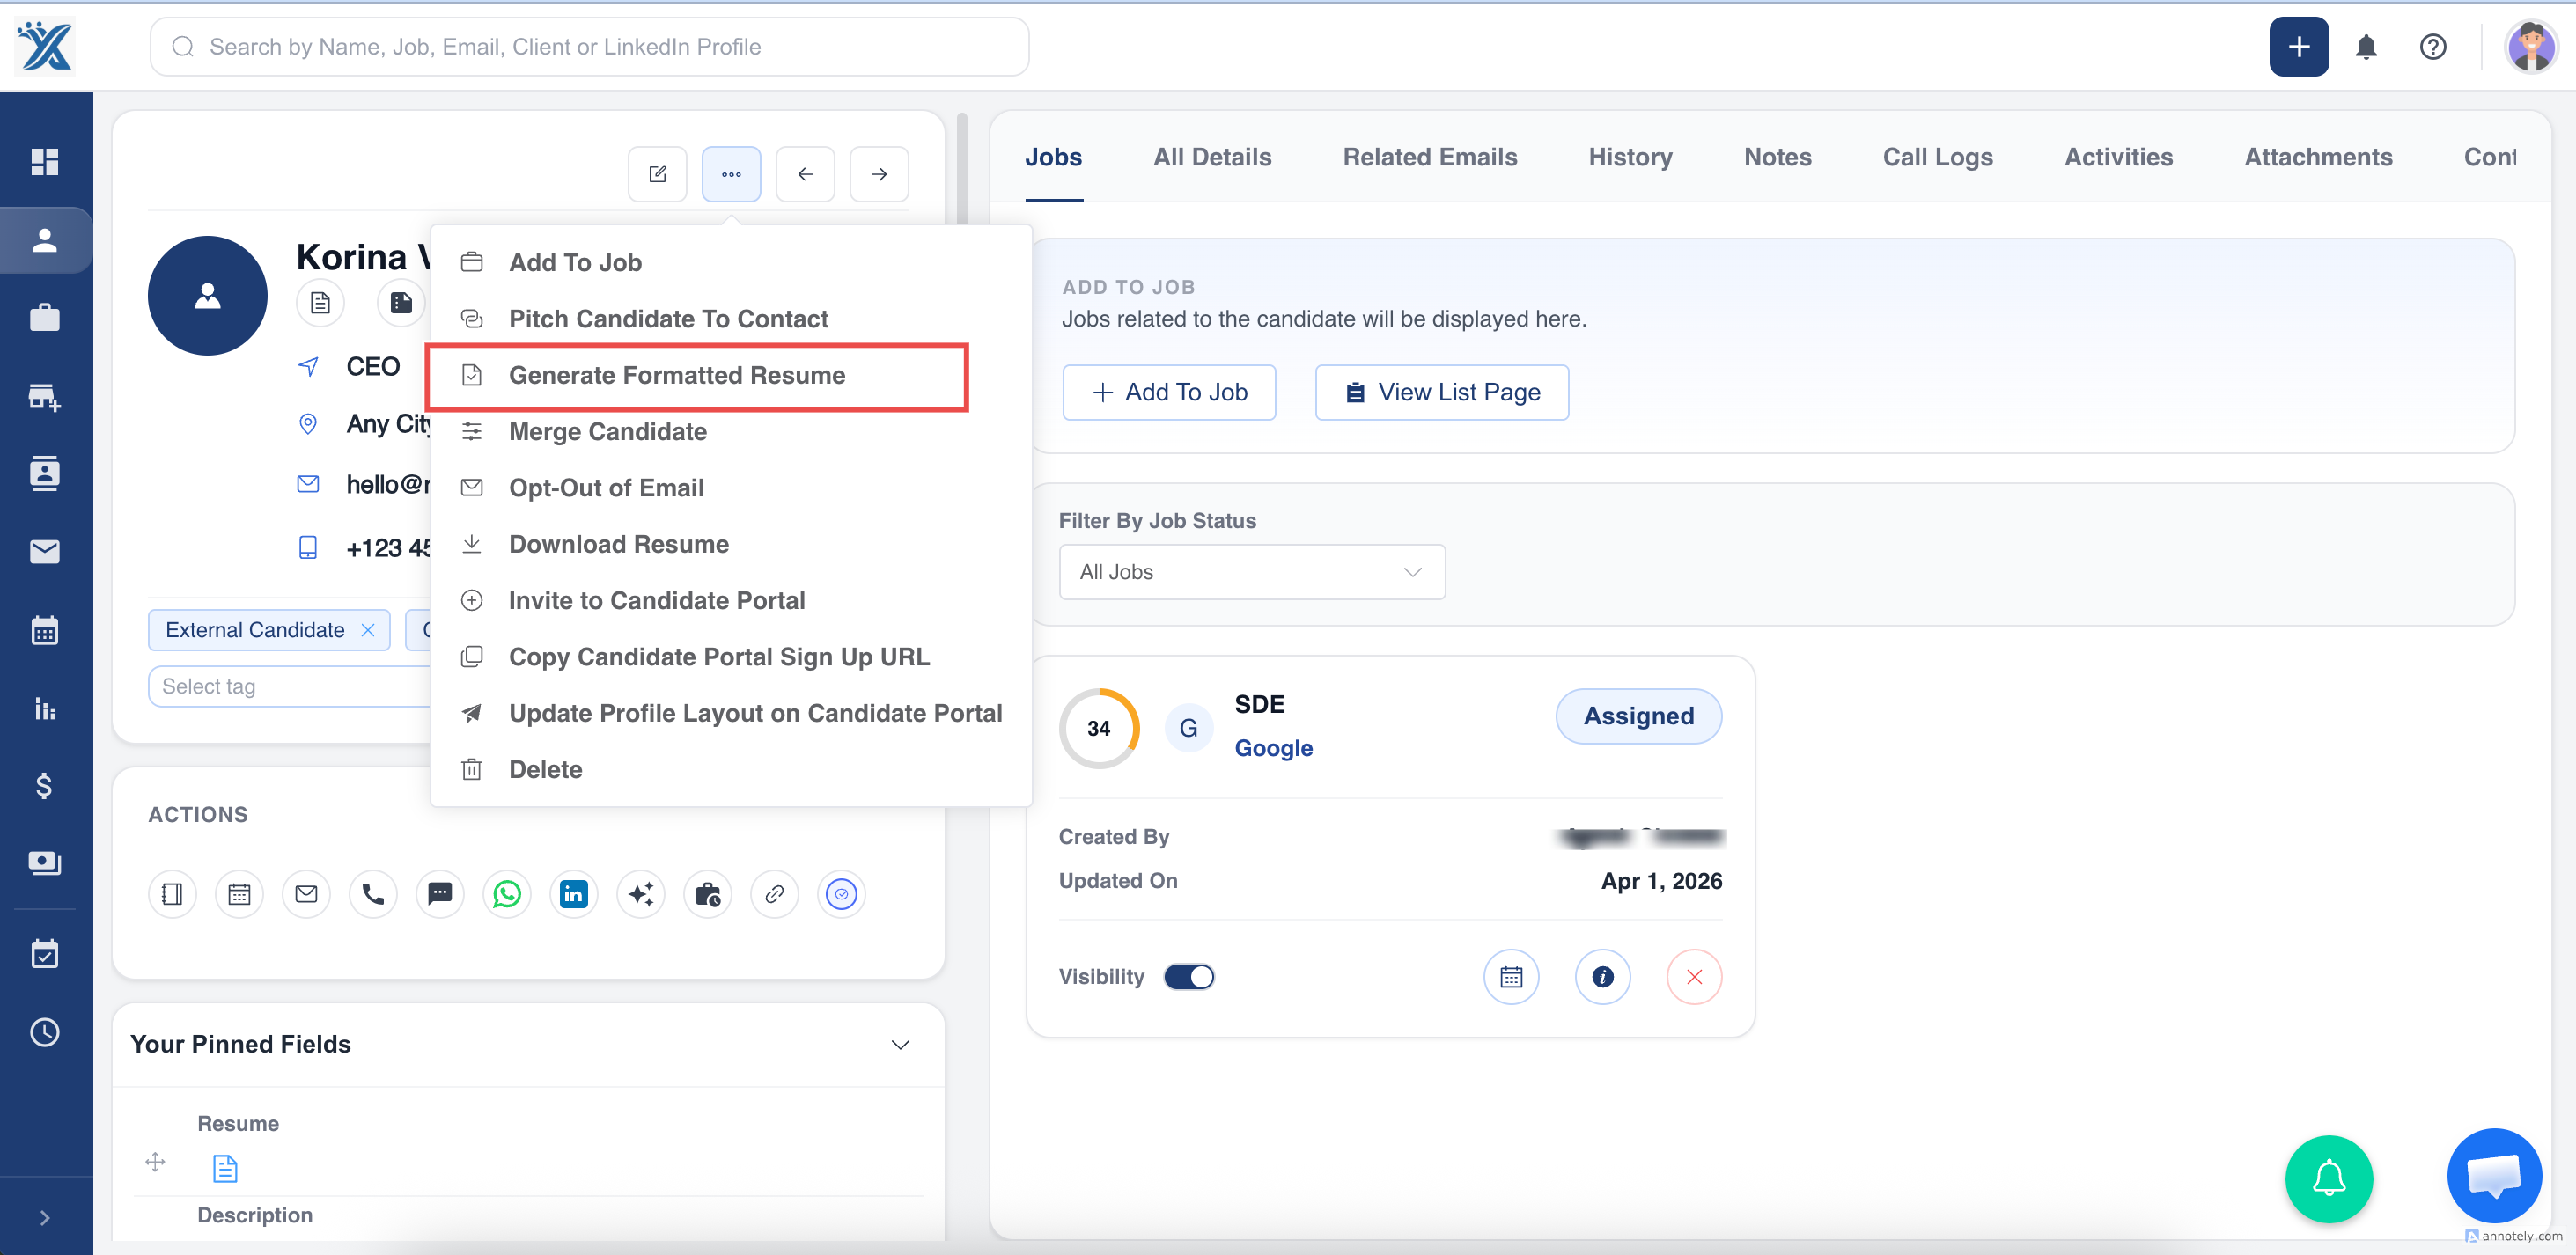
Section titled “How to Format Resumes/CVs”Step 1: Access the Formatting Option
Section titled “Step 1: Access the Formatting Option”To format a candidate’s resume, you can choose either of the following methods:
Go to the candidate profile, click the three dots (⋮) in the top-right corner, and select “Generate Formatted Resume.”
**
 **
**
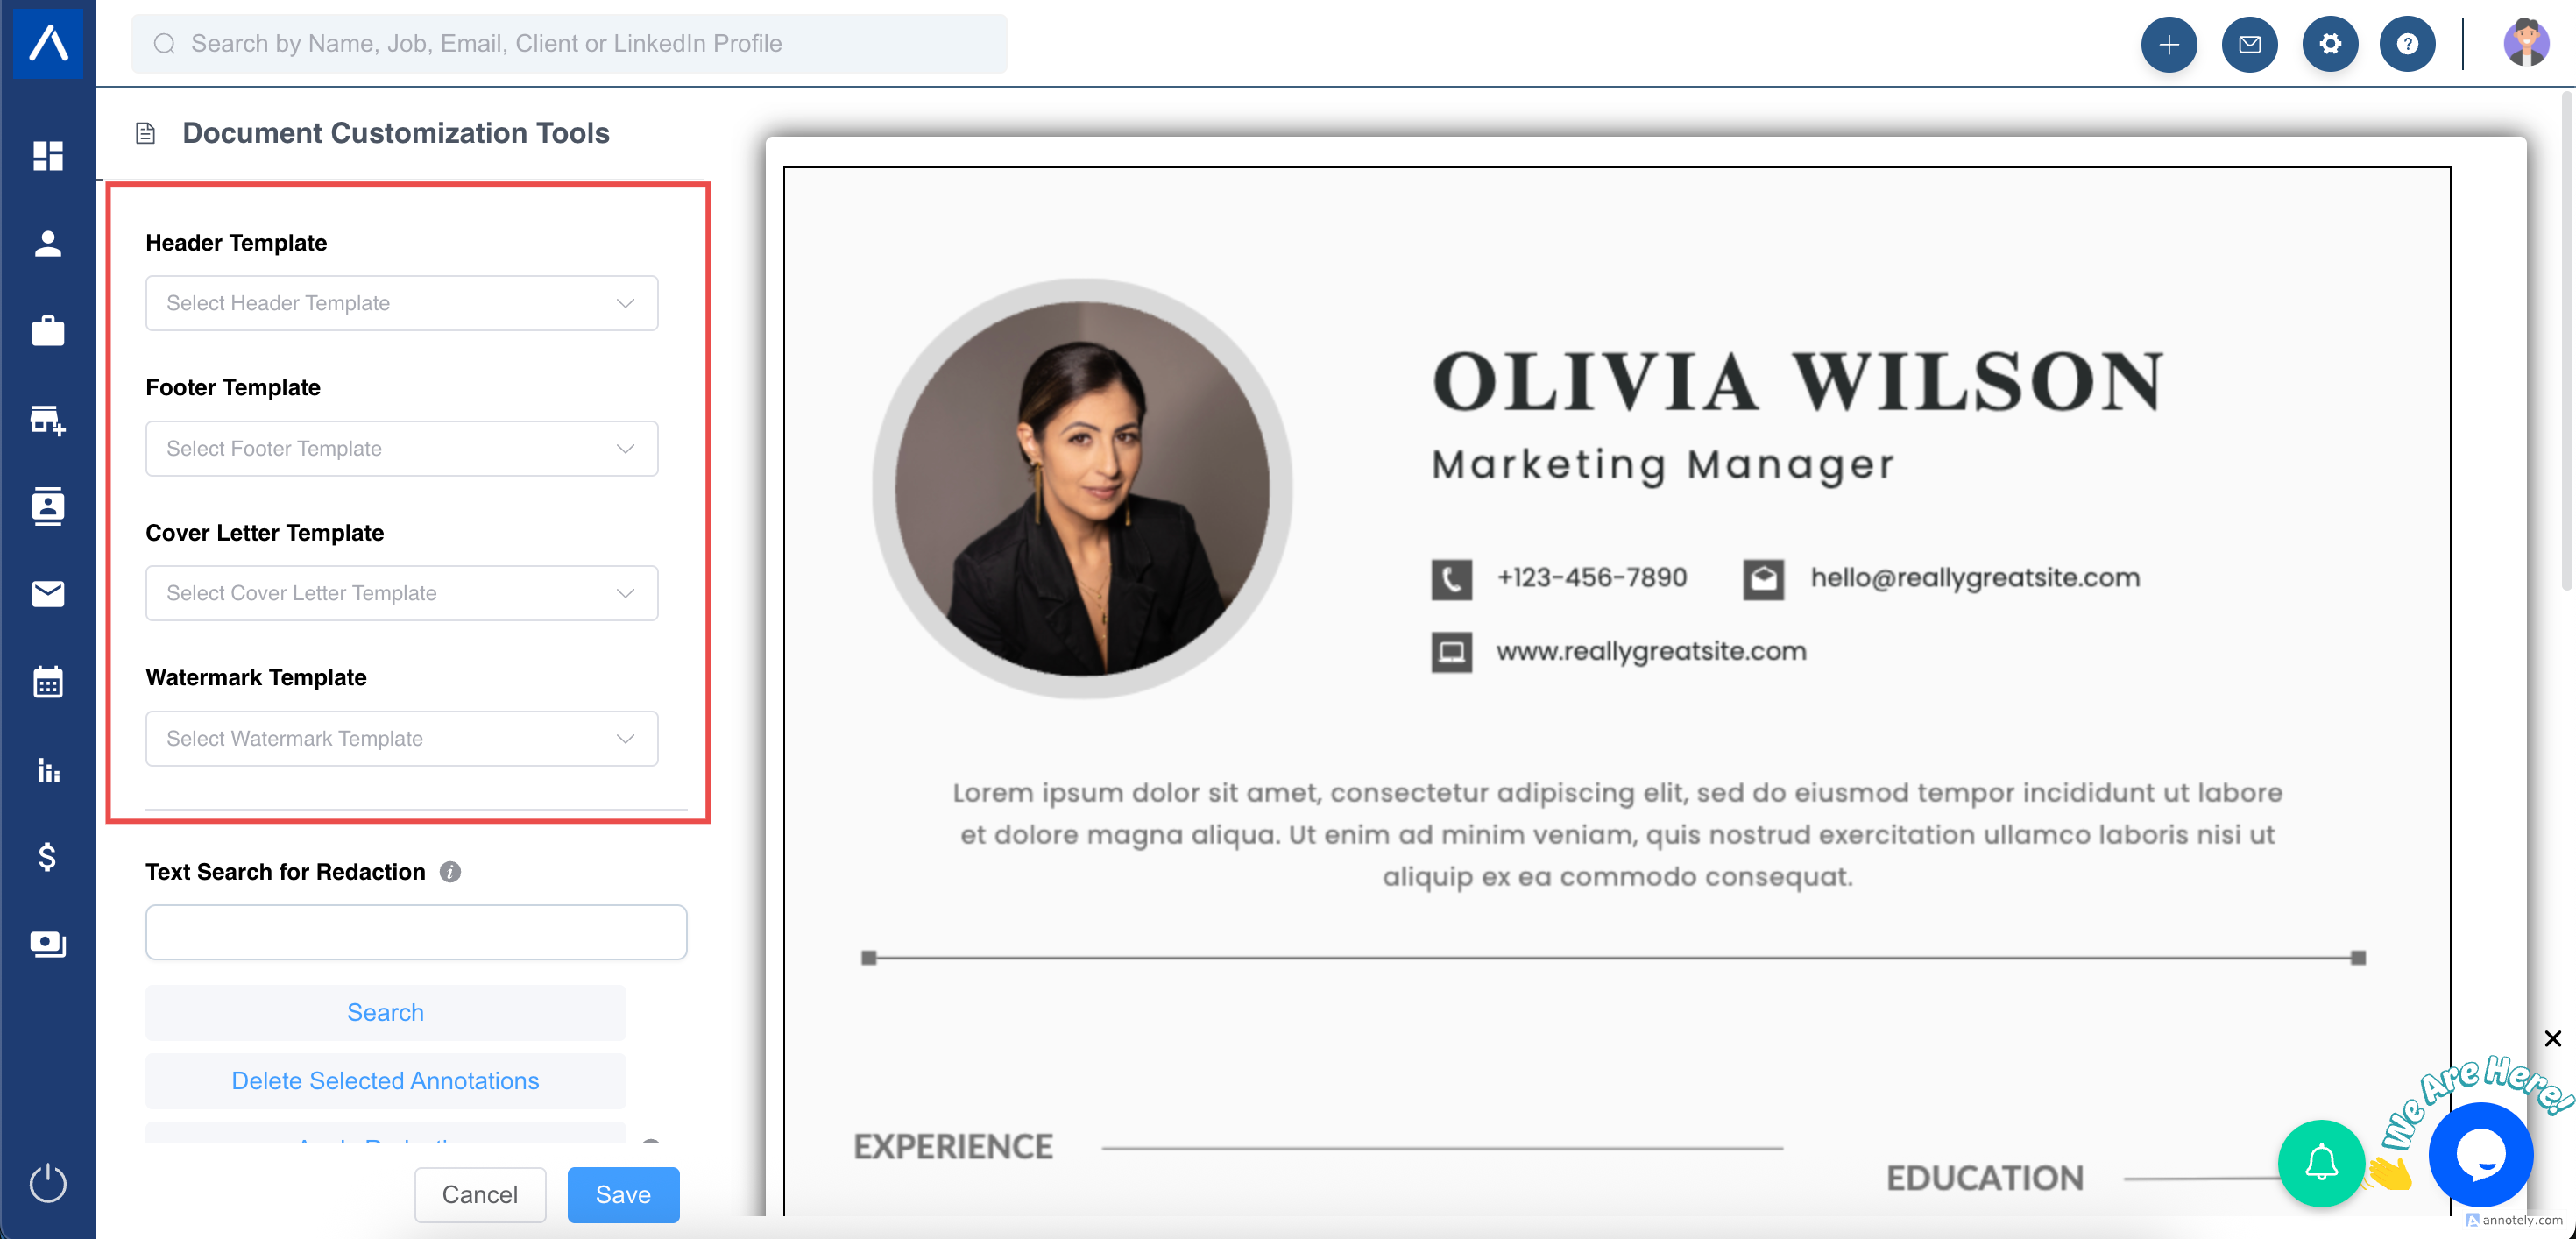
Step 2: Choose or Create a Template
Section titled “Step 2: Choose or Create a Template”Under the Templates section, you’ll find options to add:
- Header
- Footer
- Cover letter
- Watermark
You can use a pre-existing template.
**
 **
**
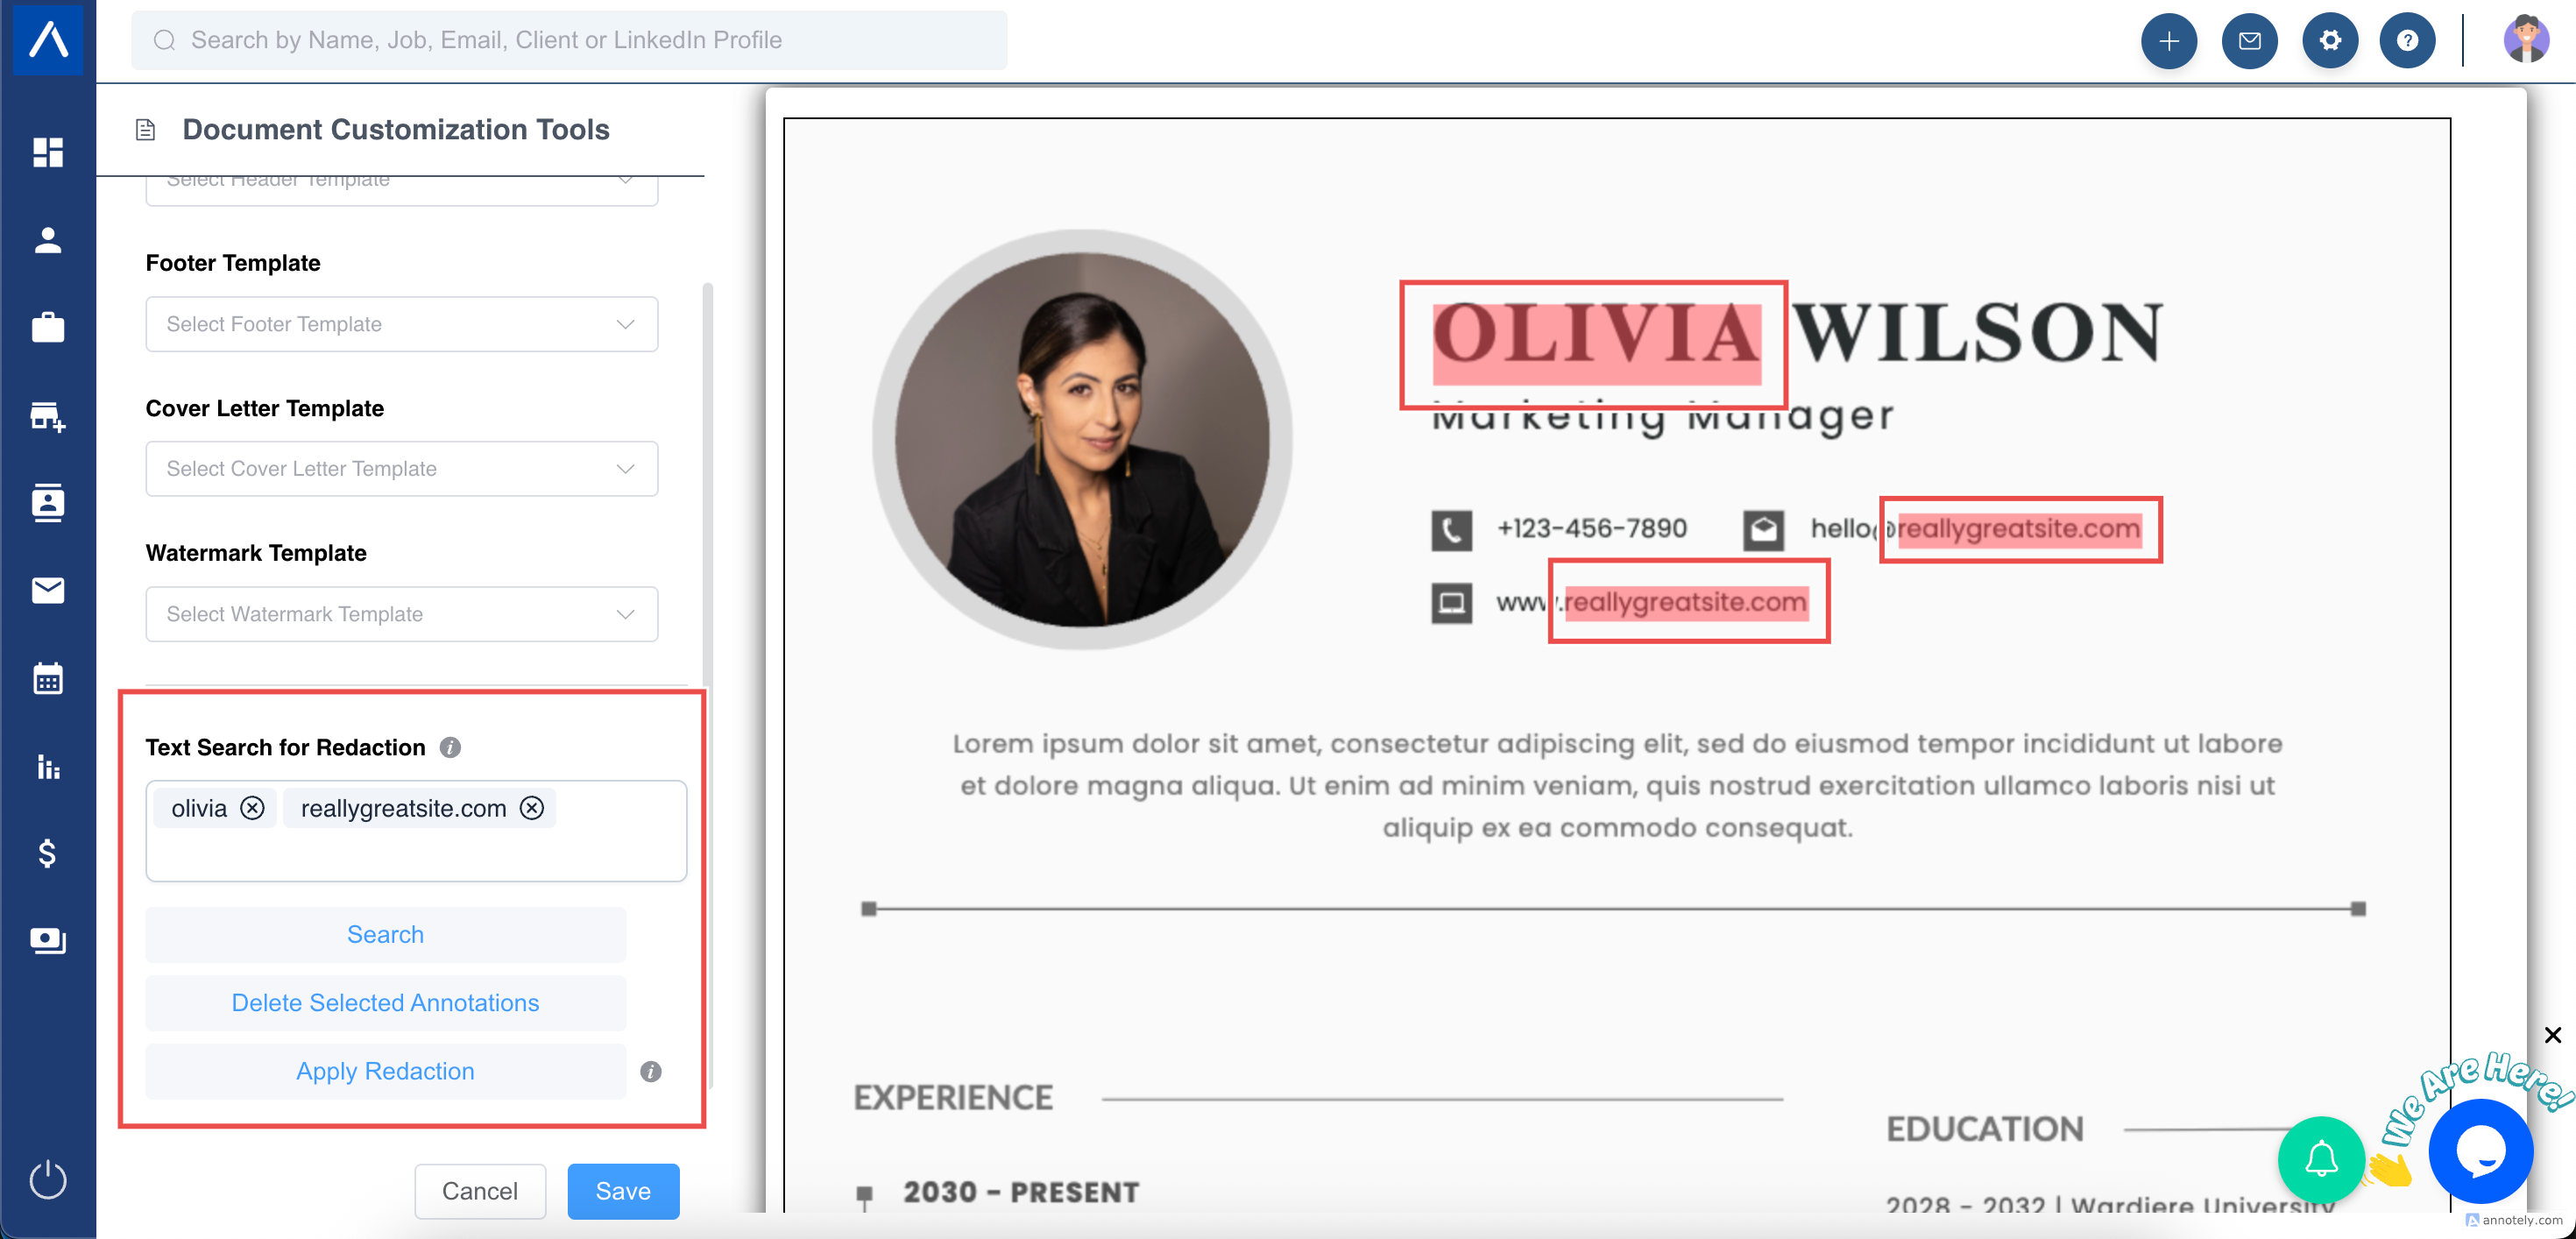
Step 3: Use the Text Redaction Tool
Section titled “Step 3: Use the Text Redaction Tool”The Text Redaction feature lets you hide any information you don’t want clients to see — such as candidate names, emails, phone numbers, or addresses.
You can:
- Search by keyword to remove specific information. Simply enter the keyword under “Text Redaction,” and the system will automatically highlight matches.
- Click “Apply Redaction” to remove all selected text.
**
 **
**
Step 4: Manually Select Text to Hide
Section titled “Step 4: Manually Select Text to Hide”You can also redact manually: just draw a box around the text you want to hide and click “Apply Redaction.”
**
 **
**
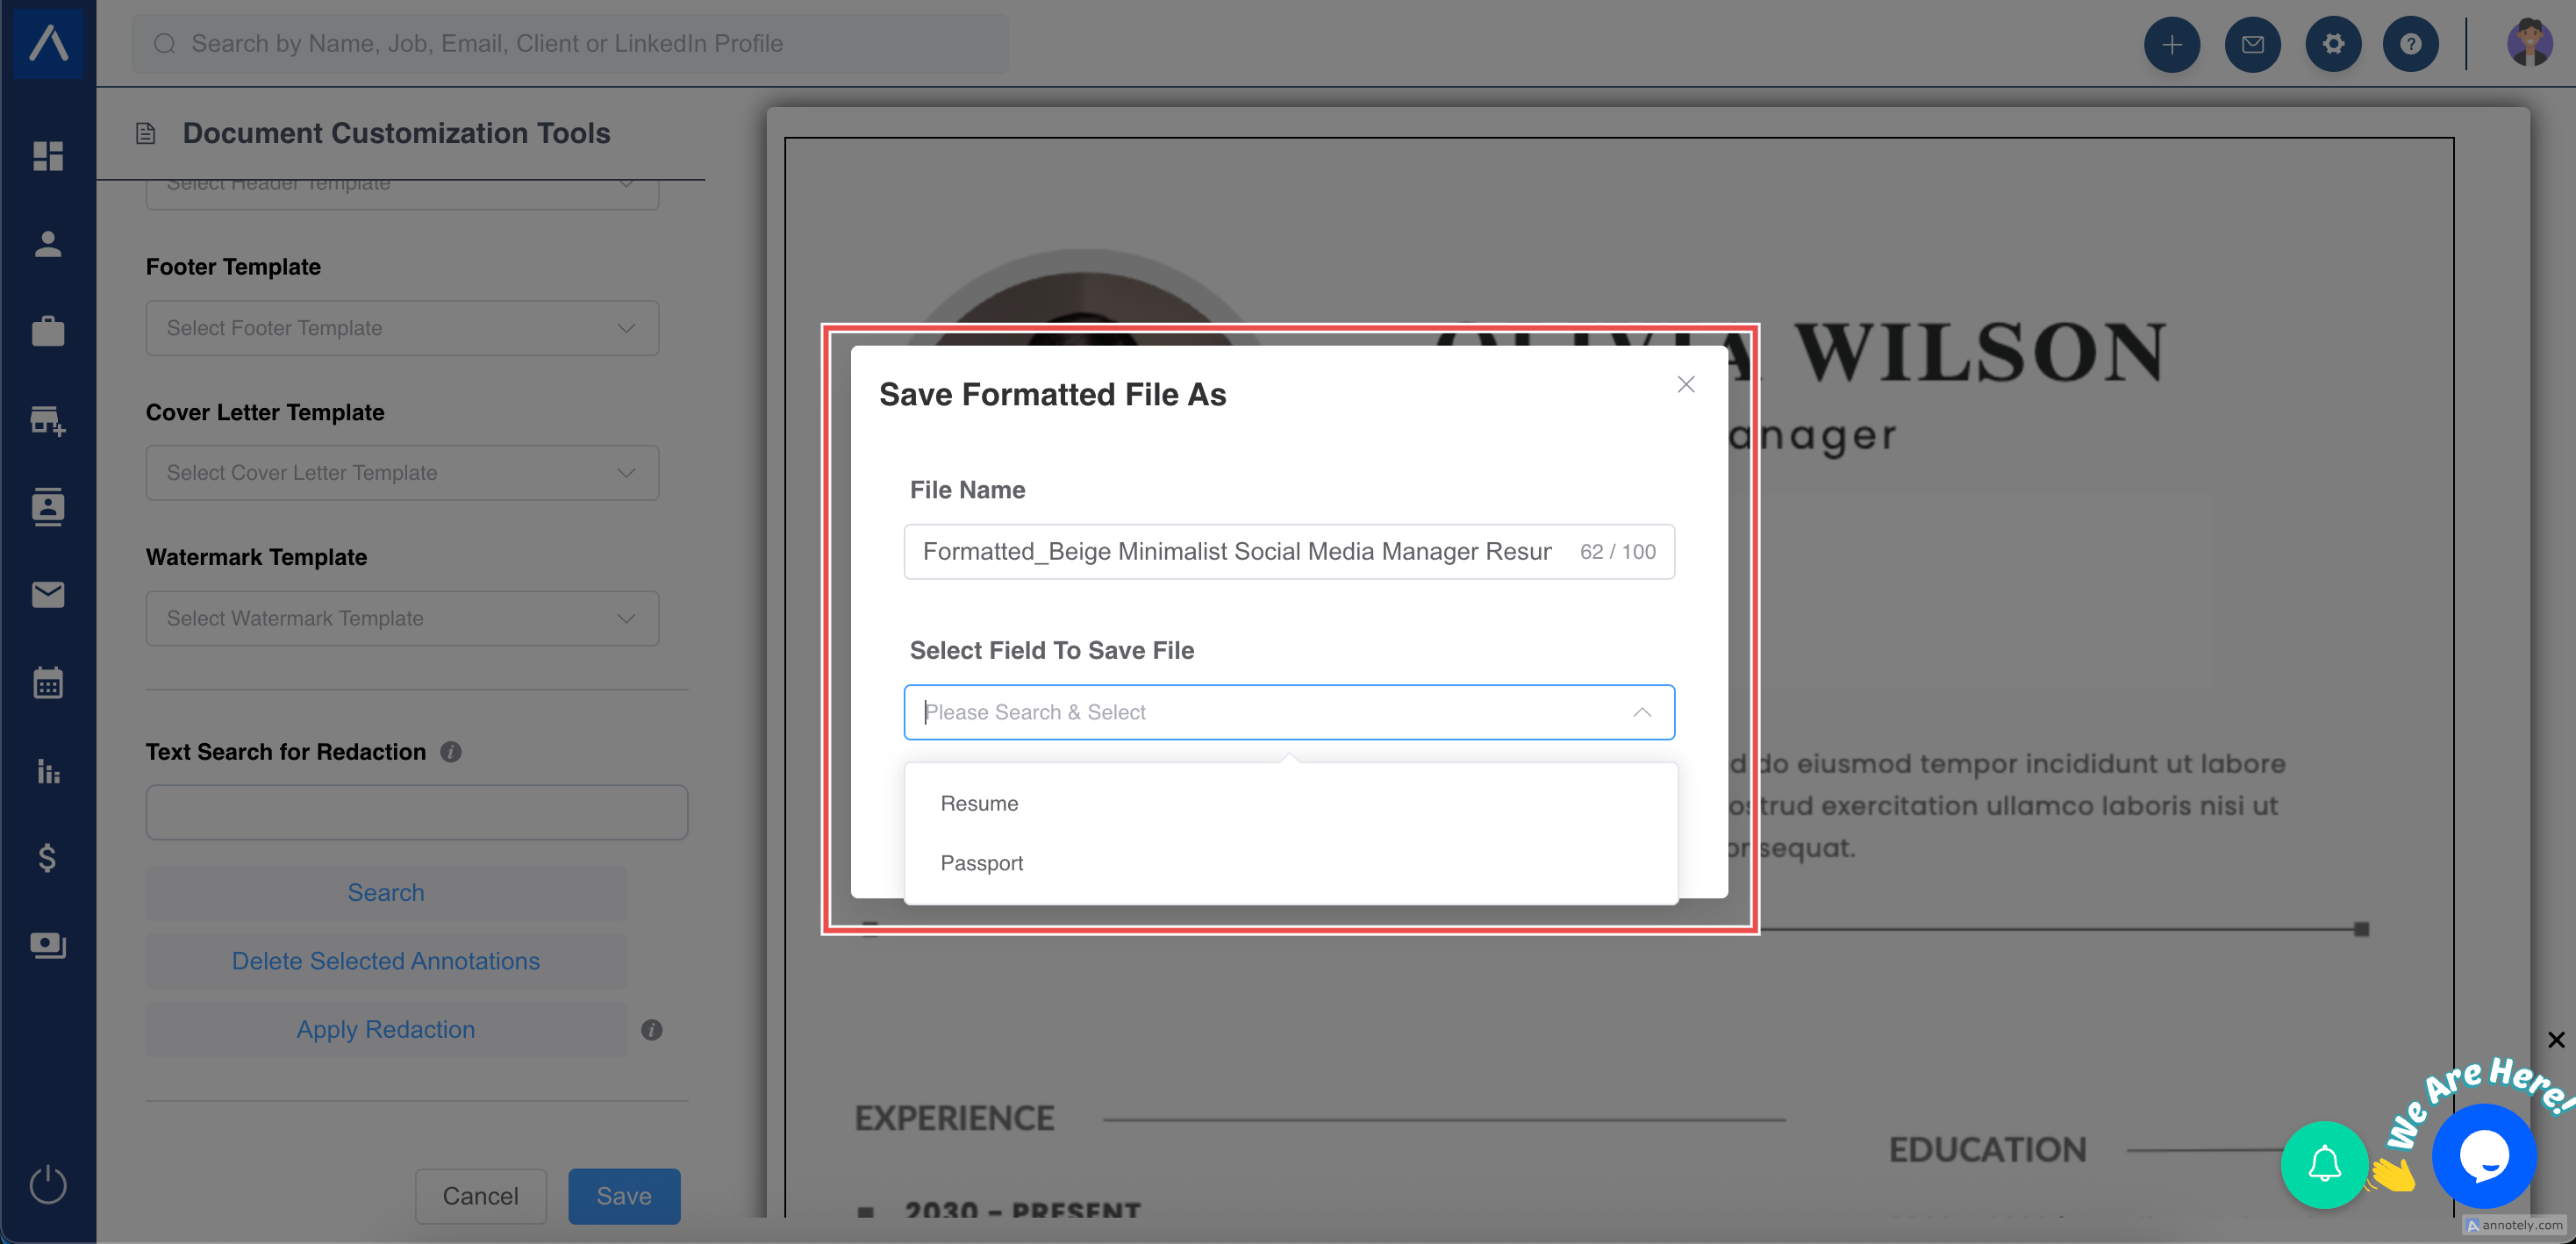
Step 5: Save Your Formatted Resume
Section titled “Step 5: Save Your Formatted Resume”Once you’ve applied all changes, click the blue “Save” button. A pop-up will appear where you can rename the file (optional).
By default, the formatted CV will be automatically saved within the candidate’s Files section — unless you’ve set up a custom field for this purpose.
Step 6: Save to a Custom Field (Optional)
Section titled “Step 6: Save to a Custom Field (Optional)”If you’ve created a file-type custom field under Candidate Fields, you can choose to save the formatted CV there.
Just select the desired field from the dropdown under “Select Custom Field To Save File” and click “Save.”
Only file-type custom fields created under Candidate Fields will appear here. If you don’t have one yet, you can create it using the “Create New Custom Field” option or by navigating to Candidate Fields.
And that’s it — your branded, client-ready resume is ready to go!
Before you start, you may also want to review our article on Creating Header, Footer, Cover Letter, and Watermark Templates to make formatting even faster.
If you have any questions, feel free to reach out via the blue chat icon in the bottom-right corner. We’re happy to help!